Showing posts with label Pink Little Notebook. Show all posts

Friday, November 1, 2019

Final Reveal: My Ice Cream Shop

Let me start this post by saying, 

This final reveal is soooo long overdue. Sorry!

The funny thing about it all is I actually thought I would have a spare moment once everything was done and my shop was up and running.  I couldn’t have been more wrong—the hard work just began.

Grand opening day was an exciting one. I couldn’t believe we had a line up out the door.

Grand Opening Day June 8th
Ice Cream Donut Sandwich + Stuffed Cheesecake Sundae @ Whimsy’s

But soon after, panic mode started to kick in. Everything that possibly could go wrong, went wrong that first day. Our AC stopped working (it was a hot day), we were running out of product, one of my ice cream machines was giving me problems, I was managing new (inexperienced) staff….the list goes on.

However, I realized that my first day of craziness was a great learning experience. It taught me that there will NEVER EVER be a dull moment in this type of business!

But enough about that. Let’s get back to the reno. I’m ecstatic with the way it all turned out and just in case you forgot, let’s rewind right back to the start, shall we.

Ahhh, yes. Where it all began. The previously cluttered balloon shop. Within the first 5 minutes of walking in, I instantly got the magical “this is it” feeling. We signed the lease shortly after, took possession, and began to reno this 100-year-old beaut.

I made a budget + plan, and for the most part, was able to stick to it. I utilize any helping hands we could get. Thank you to our awesome family members and friends who helped us along the way!

I’m also so thankful I got to work with some of my favourite brands who provided us with some top-notch, durable finishings for our space. We were able to transform our dull, dingy space into an insta-worthy ice cream shop.

Replacing our ceiling tiles and getting rid of the fluorescent lighting was the start of our transformation. I feel like we knocked off 50 years just by upgrading to Genesis Smooth White Ceiling Panels .

I’m so happy we also picked a durable floor. After a busy summer with lots of foot traffic, toppings spilling all over the floor, kids running, bouncing, and playing, these Karndean Floors look as good as the day they were installed.

The white laminate countertop and tables add to the whole fresh look and feel of the shop. This affordable DIY using Formica Laminate is worth every single penny.

I for sure thought by the end of summer, my tabletops would be scratch up and ruined. But no, not even one mark on the white surface. I’m so impressed with this product!

Our marble wallpaper, painted mural and even our pastel coloured walls are the favourite backdrops for our customer’s ice cream selfies.

I’ve even seen people sneak into the bathroom to take pictures with this amazing Milton & King wallpaper.

Our back-counter wall is covered in white penny rounds. To jazz up this plain tile, we used customized pink grout. We put up acrylic menu boards and tried to keep everything with clean lines. Even our hand washing station is next level with a fresh, modern and highly functional design aesthetics.

It was definitely a different experience to decorate an ice cream shop versus my home. But it just goes to show you, picking quality finishings is always the best investment for the long run.

For a complete overview of our shop, check out this 360.

Thanks so much for following along on this new venture. If you are ever in the area, stop by and say “hello”!

Click through these links to see more about our shop makeover: Some Pretty Exciting News, We all Scream for Ice Cream!, Old Dated Ceiling Tile-No Problem, DIY: How to Update Old Ceiling Tile, Marble Accent Wall with Murals Wallpaper, Is Vinyl Flooring a Good Choice?, Our New Karndean Floor, DIY Laminate Countertops, Finishing Details

Ceiling Tile: Genesis 2x4ft Smooth Pro White Ceiling Tiles
Floor: Karndean LooseLay Longboard in Pearl Oak.
Countertop/Tabletops: Formica Infiniti ColorCore2 Laminate Sheets
Paint Colours: Valspar 1105-8A Romantic Smoke + 5005-3C Nuance
Sink/Faucet: Blanco Diamond Bar Sink, Concrete Grey / Alta Bar Faucet
Marble Wallpaper:  Murals Wallpaper, Crackle
Painted Flower Mural: by Mercedes Papalia
Bathroom Wallpaper: Milton & King, Roadtrip Wallpaper
Tile: White Penny Rounds
Grout: Grout 360
Menu Boards: Acrylic sheets

The post Final Reveal: My Ice Cream Shop appeared first on Pink Little Notebook.


from Pink Little Notebook https://ift.tt/2r42KDN

Thursday, December 6, 2018

Christmas Napkin Holders (Free Printable)

No matter what’s on the menu this holiday season, your tablescape deserves a special touch. Today I created a free napkin holder printable to help add a little sparkle to your place settings. All you need is a couple of supplies and a printer!

SUPPLY LIST

Card stock (any colour will work)
Free Printable
7/8″ or 1″ wide Ribbon
Scissors
Single Hole Punch
OPTIONAL: Embellishments (such as candy canes, fresh greenery, pine spring, eucalyptus, ornaments, festive chocolates, etc)

INSTRUCTIONS

1.  These napkin holders are super simple to make. The first thing you will want to do is download the free printable using the link below.

FREE PRINTABLE – Christmas Napkin Holder

2.  Be sure to print on heavy text paper or card stock. You can get creative and use fun colours to match your holiday decor.

3.  Cut each rectangle out just inside the black line. Carefully punch holes on either sides of the rectangle.

4.  Depending on how big your napkins are, cut as many lengths of ribbon as you need. About 10 inches should be a good length. That will give you plenty of room to snip the ends neatly.

5.  Lay a piece of ribbon on a flat surface lengthwise and place your folded or rolled napkin on top of the ribbon. If you want to get fancy with your napkins, just YouTube some napkin folding techniques.  There’s a ton of great ideas.

6.  Take your rectangular shaped printable and carefully poke the ends of the ribbon up through the holes on each side.

7.  Pull the ribbon tight but do it very gently so you don’t tear through the hole. Snip the ends of the ribbon so they are equal length.

8.  To add a little pizzazz tuck a piece of fresh greenery, a candy cane or embellishment behind the napkin ring. The sky’s the limit.  You can definitely make these a few days in advance to your event.

Happy Holiday planning!

The post Christmas Napkin Holders (Free Printable) appeared first on Pink Little Notebook.


from Pink Little Notebook https://ift.tt/2KZYGub

Thursday, November 29, 2018

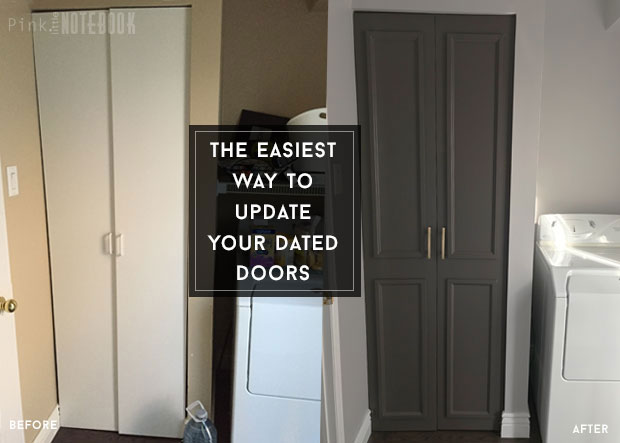
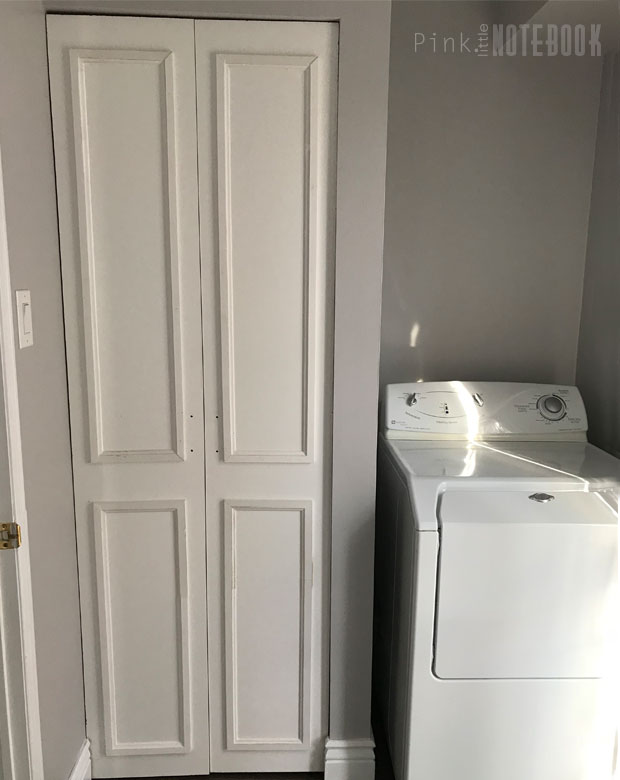
The Easiest Way to Update a Flat Panel Door

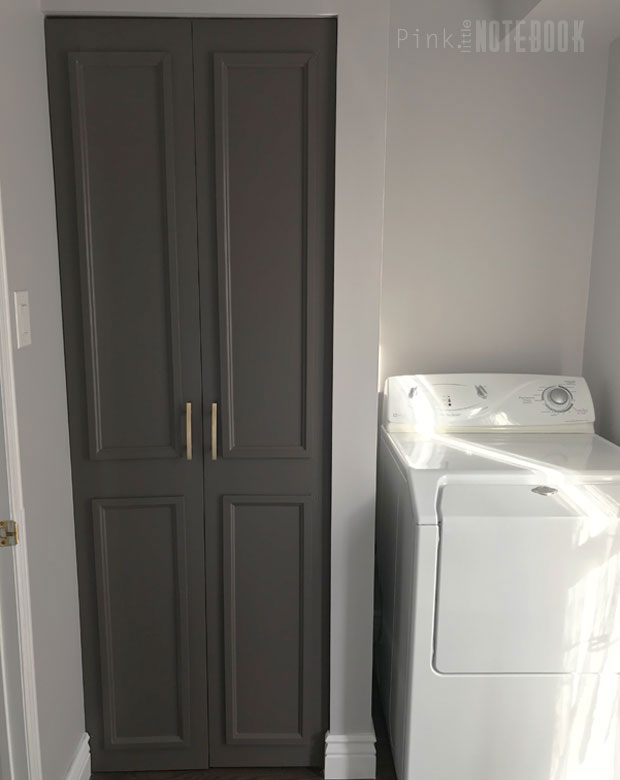
Doors play a more important role in decor than you might think. Just as updating your front entry door can make a substantial impact on your home’s curb appeal, updating your interior doors can make you feel like you’ve done a remodel.

To get the look of costly paneled doors (without the expense), a little moulding, paint and new hardware can go a long way.

Add style and detail to any of your doors with this quick and easy DIY project.

Materials

Moulding/Trim
Primer
Melamine+Cabinet Paint
Paint Brush/Roller
Nail Gun
Wood Putty
Hand Sander
Door Hardware

Instructions

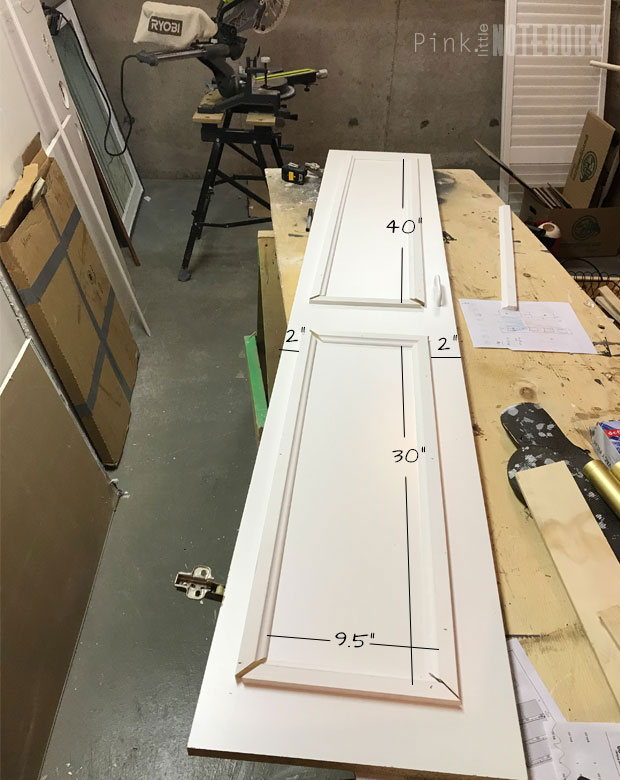
1.   You want to choose a molding that accents but doesn’t overwhelm your interior doors.  Measure and calculate the size of the frames that you need to make.

2.  Cut your moulding pieces down to size for each door with a mitre saw and lay out your trim on the doors.  Before you secure it in place, measure for even placement.

*TIP* Use a nail gun to secure the moulding instead of wood glue. You eliminate any wait time. 

3.  Fill in the nail holes and any cracks in the corner with wood putty.  Sand it all down once it dries.

4.  There is no easier or more impactful way to update your doors than painting them.  To begin, use a primer to prep—a good primer is key to a great paint job. I used Para Paints Colour Boost Primer.

*TIP* To paint both sides of the doors simultaneously, it’s better to have the doors on the hinges vs laying flat.  It cuts dry time in half.

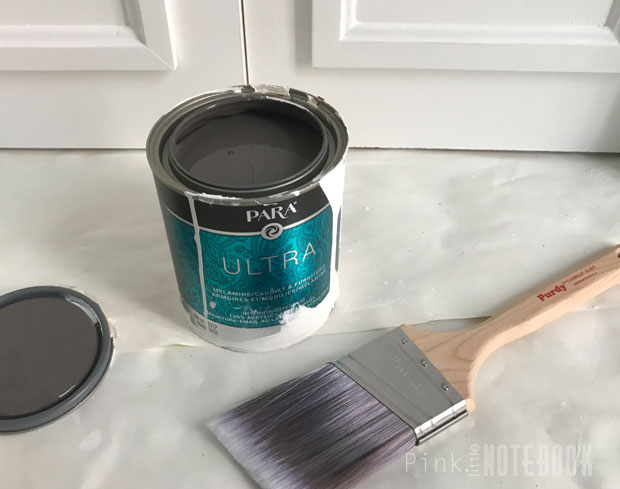
5.  To get the ultimate surface protection and durability, it’s important to use paint specifically made for your surface. My go-to paint for furniture and doors is Para Paints Melamine, Cabinet and Furniture Paint (shown here in the colour Brushed Nickel, P5244-62). I apply my last two thin layers of paint with a high-density paint roller.

Paint alone always makes the biggest difference but add a little moulding and new hardware and you got yourself a brand new door.  It’s such a quick and easy way to dress up those old doors.

Disclosure: This post was brought to you by My Colour Journey With Para Paints.  As always, all thoughts and opinions are my own. #mycolourjourneywithPARApaints

The post The Easiest Way to Update a Flat Panel Door appeared first on Pink Little Notebook.


from Pink Little Notebook https://ift.tt/2FMIugJ

Thursday, November 8, 2018

DIY Jewellery Drawer Insert

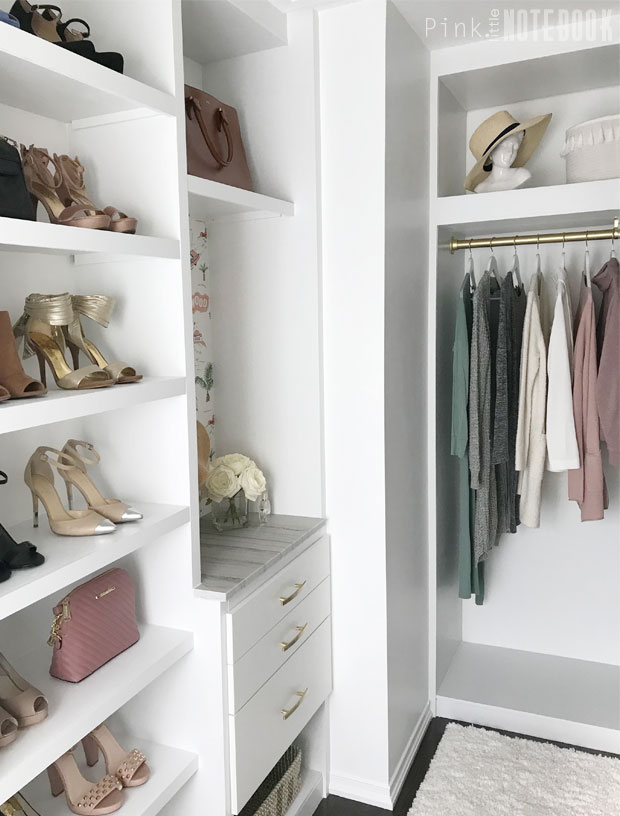
When I revamped my walk-in closet recently, I knew I needed a wardrobe specifically to help organize some of my smaller accessories.  Since I couldn’t fit a dreamy closet island in my space, I had to come up with a small scale solution that would work for my closet.  Something practical but cute.

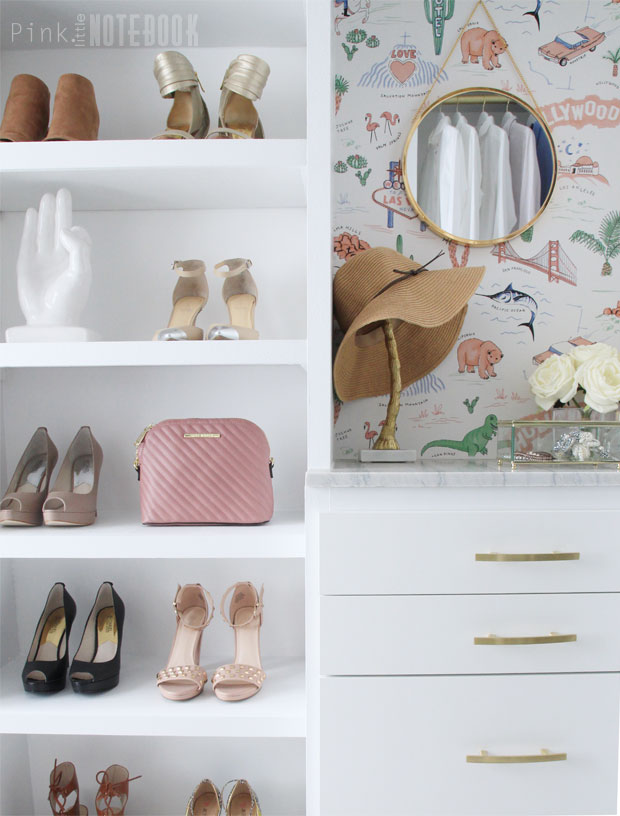
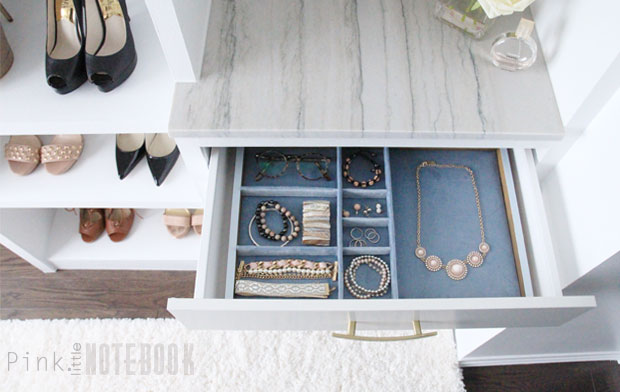
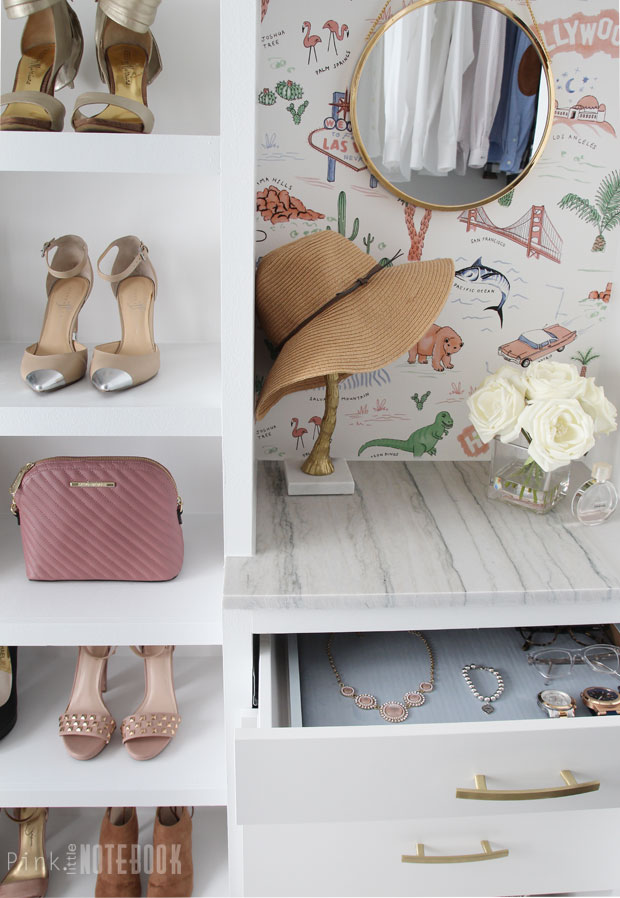
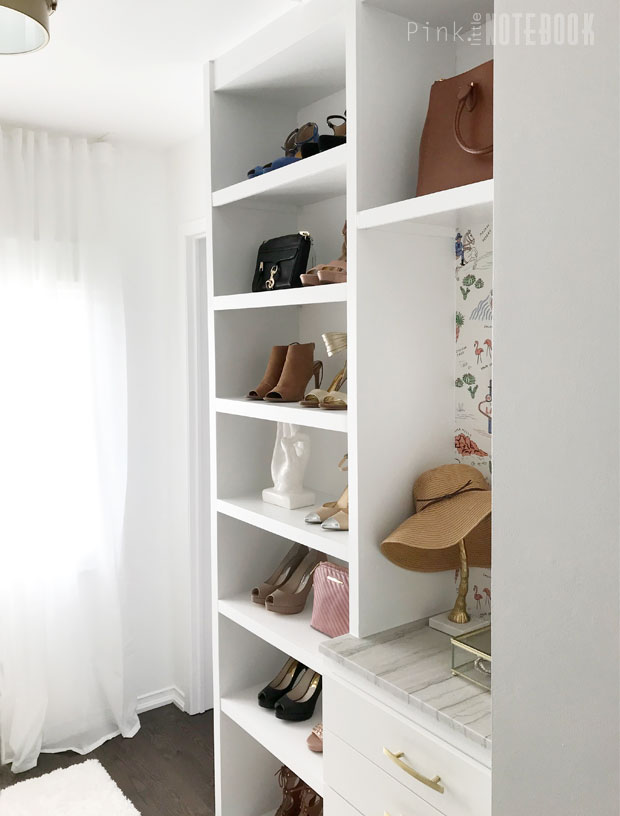
In the end, I dedicated one wall to accessories.  Our built-in unit included a floor-to-ceiling shoe shelf and a small vanity area complete with jewellery drawers and a quartz countertop.

As you may know, I had many challenges when it came to building this closet—space depth being one of them.

For this project, I had a max depth of 15″ to work with and the IKEA shallow base kitchen drawers (24″ x 14 3/4″) worked perfectly.  However, the rare size made it next to impossible to find a jewellery drawer organizer.  Most inserts are made to fit the typical drawer depth of 24″.

Determined to stick to my vision, I decided to create my very own jewellery drawer insert. Here’s how I did it.

MATERIALS

Wood (I used sanded 1/2″ plywood)
Stain/Paint
Cardboard
Velvet 
Spray Adhesive 
Glue Gun
Nail Gun 

1. CREATE A FRAME

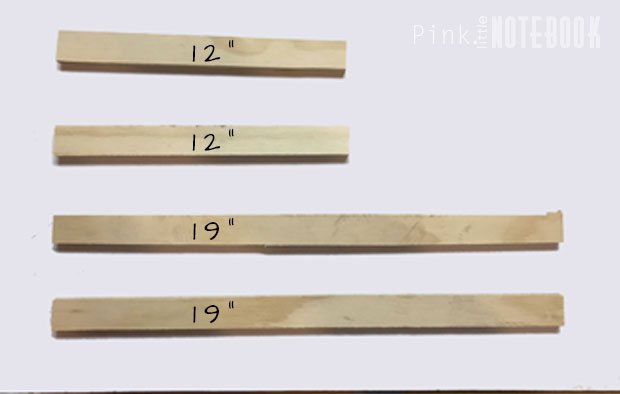
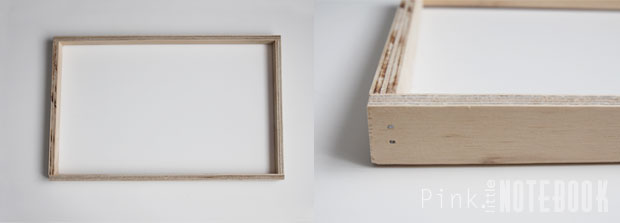
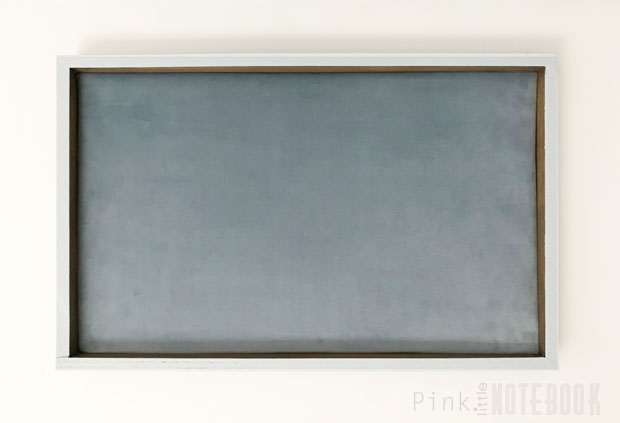
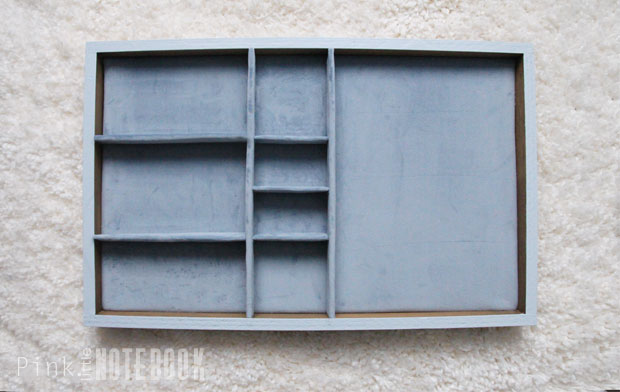
Since I had a bunch of scrape pieces of wood leftover from our closet built-ins, this is what I used to create the frame of the drawer insert.  Although the IKEA drawer size is 24″ x 14 3/4″, the actual interior of the drawer is 19″x 12″.  So I cut the wood pieces to size, with a height of 1 1/4″.  I secure the frame using a nail gun.

2. STAIN & PAINT

After a good sanding, I stain both the interior and exterior sides of the frame. Since cut plywood doesn’t absorb stain easily, I use a roller to paint the top edge in a light blue. This covers and hides the exposed edge.

3. CARDBOARD BASE

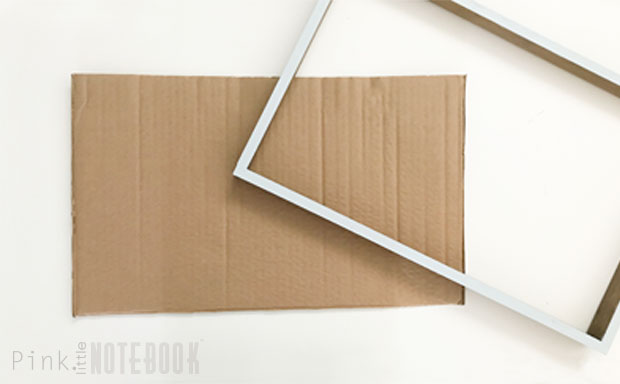
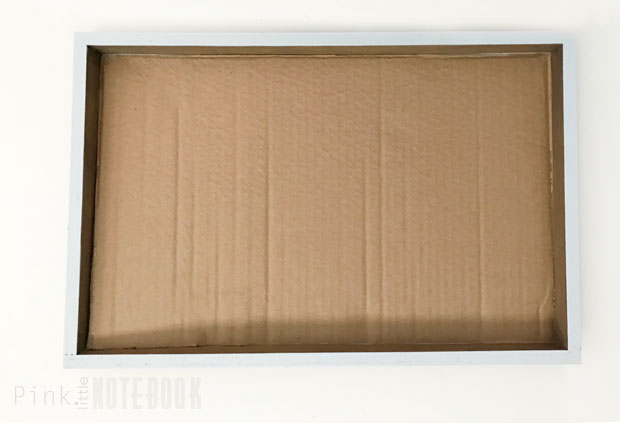
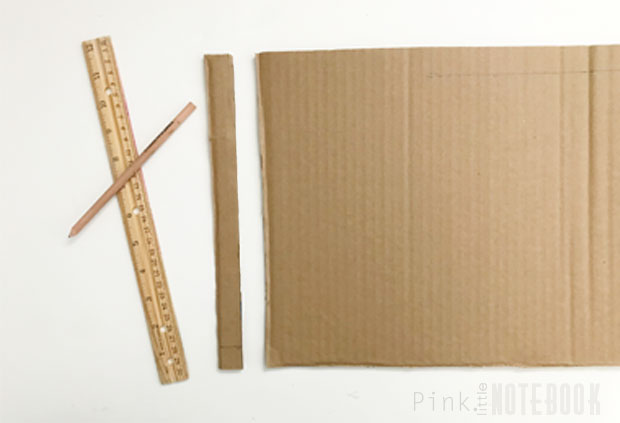
Next I grabbed a cardboard box and cut out the base of the drawer insert (18 1/2″ x 11 1/2″). Before you move to the next step, test it out.  Make sure it fits snug.

4. APPLY FABRIC

It’s important to line your jewellery drawer with velvet.  This prevents it from shifting around when you open and close your drawer. Make sure you iron out all the wrinkles in the fabric before you begin.

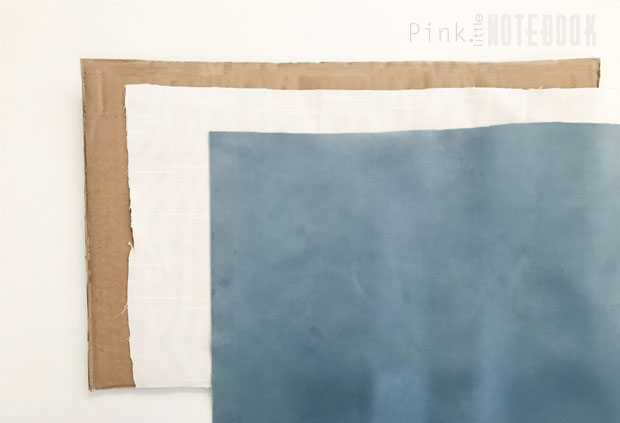
To avoid seeing cardboard ridges through the velvet, make sure you line the cardboard first.  Use either a piece of batting or thick fabric and then finish with the velvet on top. This is the key to a soft smooth surface.

Spray adhesive works best to glue the fabric to the front of the cardboard. This allows for no glue lines on your finish product.

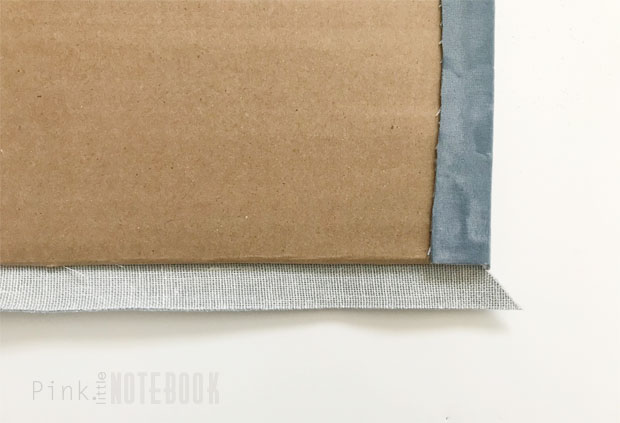
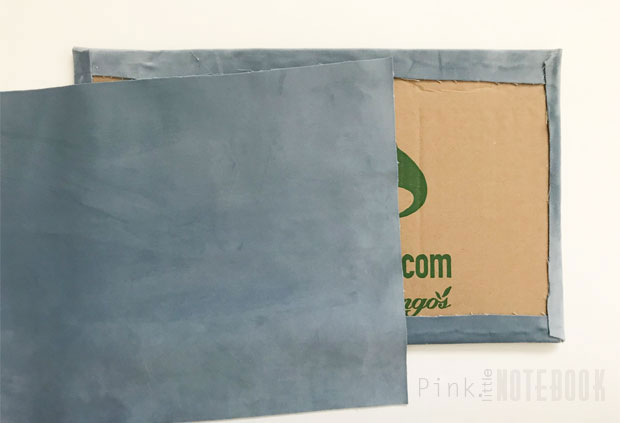
Then you flip it over, make sure you pull your fabric tight around the edges and fold the excess material like you’re wrapping a present. I used hot glue on the back for a secure hold.

5. PUT IT TOGETHER

I know no one will ever see it but I cut a piece of velvet to cover the backside. I like knowing the cardboard is completely covered 🙂

Since the cardboard is cut for a snug fit, you can slip the finished cardboard base in the frame.  It shouldn’t move but for added protection, I add a dap of hot glue to each corner from the underside.

6. ADD THE DIVIDERS

To add dividers, I cut 1″ strips of cardboard in the appropriate lengths. You can add as many or as little dividers as you want.

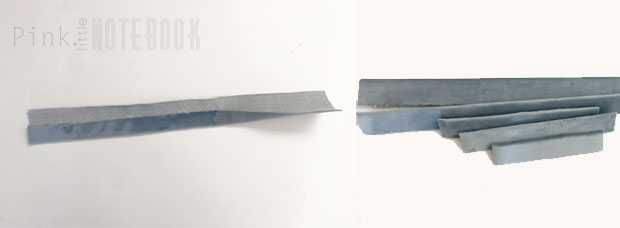
Using the spray adhesive and glue gun, I wrap each cardboard piece with fabric and cut it out.

To attach the dividers to the wood frame, I use a bit of hot glue on the ends.

I loving having a jewellery drawer in my wardrobe! Nothing beats the feeling of being organized!

Shop the Post:

Click through these links to see more from our master closet series:

Designing my walk-in closet
5 Things to know before revamping your walk-in closet
Installing our built-in closet system (with pricing)
My DIY Master Walk-In Closet Reveal

The post DIY Jewellery Drawer Insert appeared first on Pink Little Notebook.


from Pink Little Notebook https://ift.tt/2PghpHb

Thursday, October 25, 2018

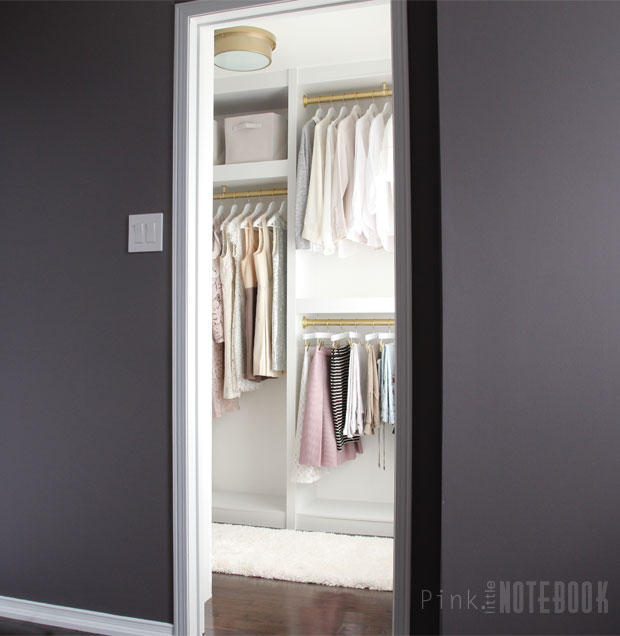
My DIY Master Walk-In Closet Reveal

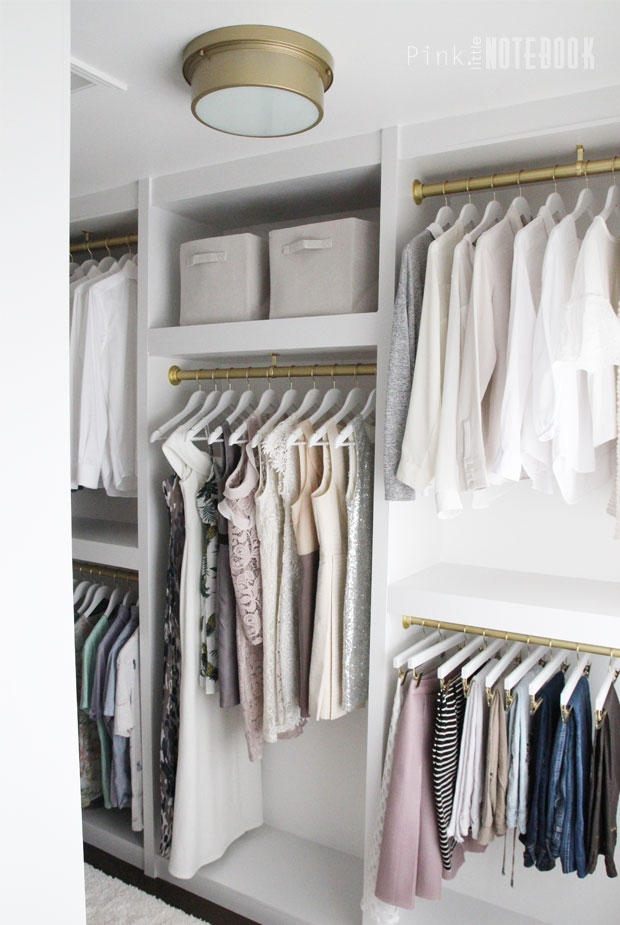
Drum roll please. . . our walk-in closet is FINALLY DONE!

This project is an exciting one for me.

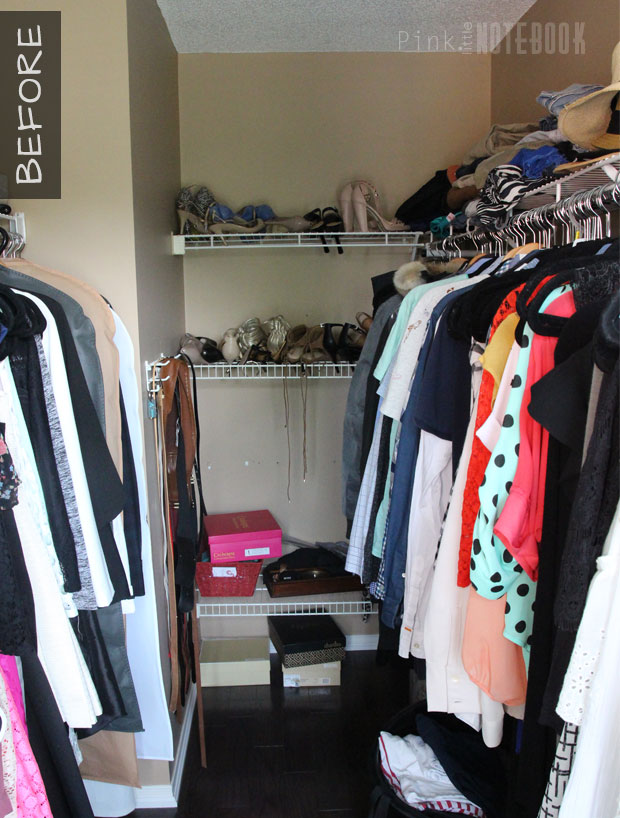
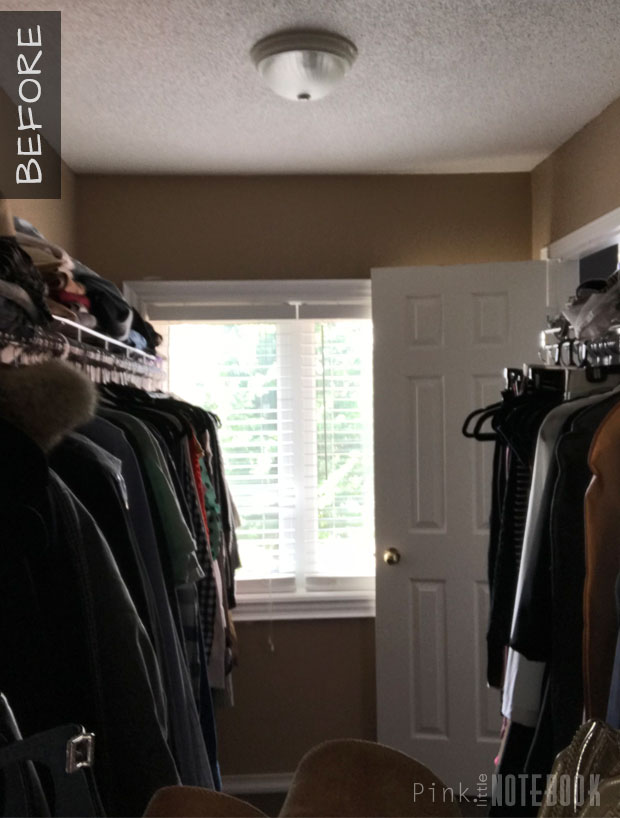
For starters, this makeover marks the completion of phase 1 (of 3) in our master bedroom.  Our neglected space is slowly getting a new “grown up” look and feel. Goodbye starter furniture from 10 years ago.

Secondly, this mama is ready for some major change and an organizational overhaul.

So it only makes sense to kick start #ProjectMaster with this walk-in closet.

This space is small but mighty. Coming up with a plan was half the battle. After doing research on different types of prefab modular closet systems, I realized the standard size units were not going to fit.

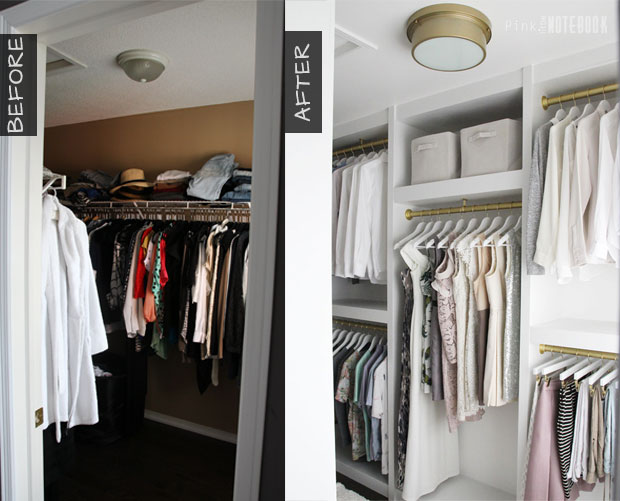
Instead, we DIY’ed our own custom closet built-ins from scratch, which we constructed out of plywood.  To maximize storage space, we created our units from floor to ceiling.

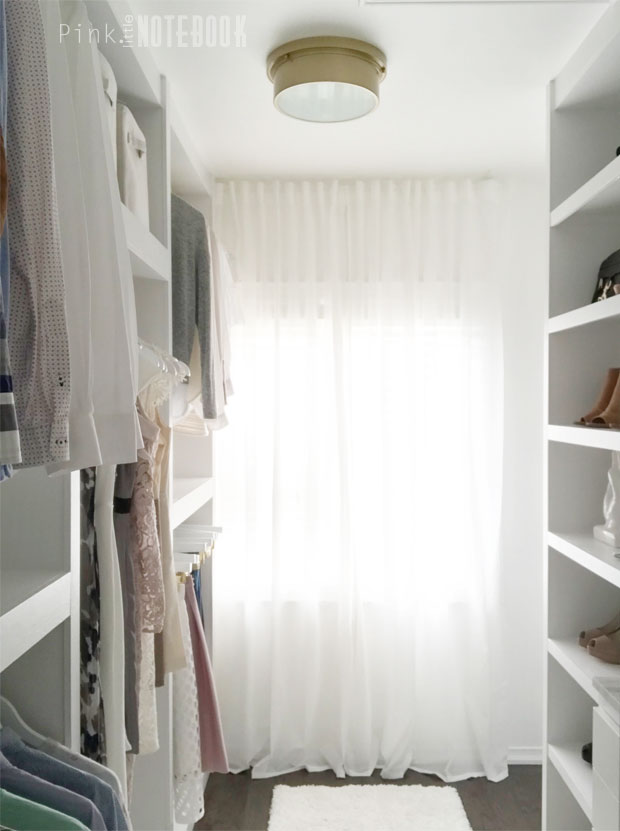
To keep things looking bright and sleek, the built-in design is kept simple and painted white.

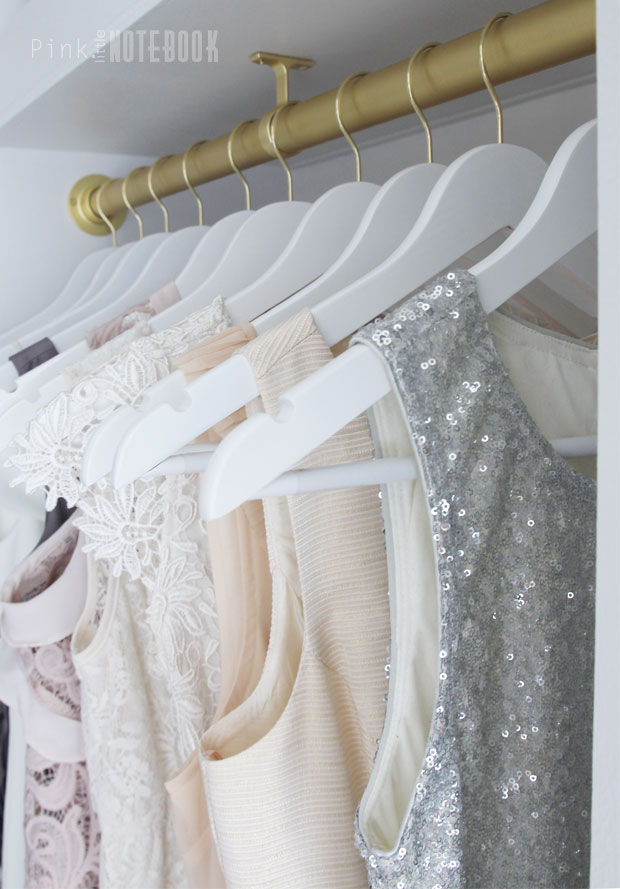
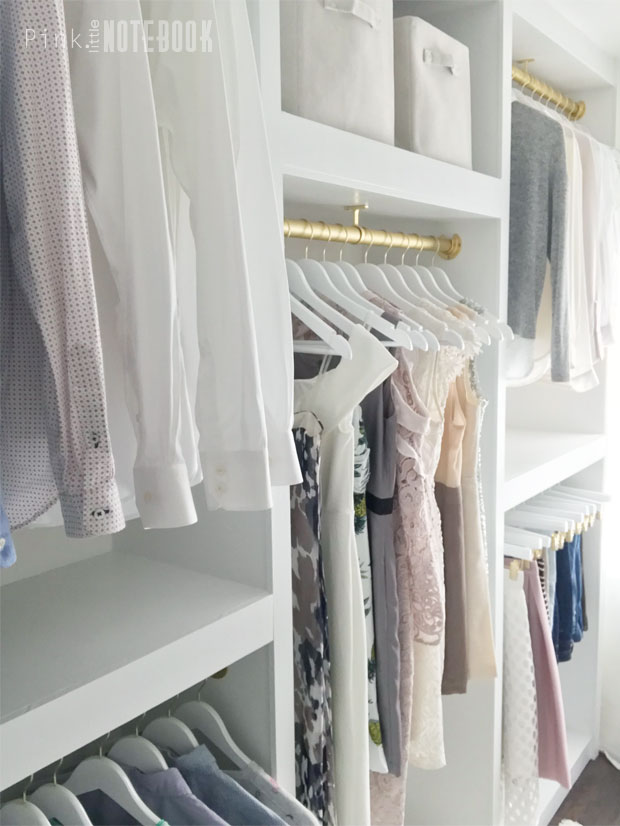
The gold closet rods, wooden hangers and plush rug add a touch of luxury to the all-white palette.

Long gone are the days where I tried to balance my heels on wire racks.

I finally have proper shoe storage.

And lots of it!

A custom closet wouldn’t be complete without drawers and a countertop. To break up the white, I added this fun colourful wallpaper from Milton & King.

The popcorn ceilings were smoothed out and the light was an inexpensive fixture I bought from my local hardware store. I spray painted it gold to match the closet rods.

White drapes are used to camouflage the oversized window partially covered by our closet unit.  The closet door is removed to create an open concept.

I’m so thrilled with this makeover.  Never in a million years did I think organizing your closet would be so life changing.  It really makes all the different.

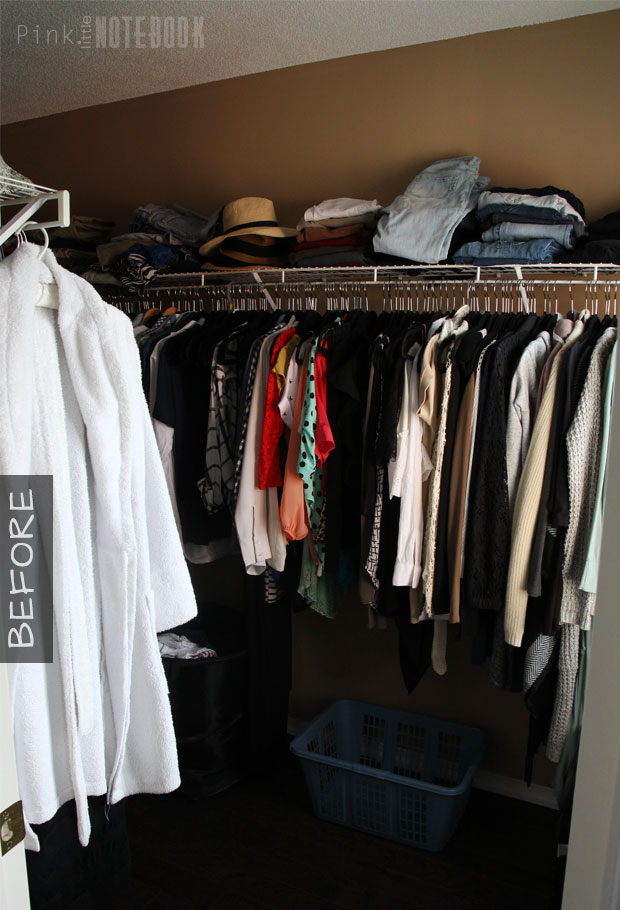
My biggest hope is that these before and after’s show someone that they can turn their dark cluttered mess into something that gives them life.

Click through these links to see more from our master closet series:

Designing my walk-in closet
5 Things to know before revamping your walk-in closet
Installing our built-in closet system (with pricing)

The post My DIY Master Walk-In Closet Reveal appeared first on Pink Little Notebook.


from Pink Little Notebook https://ift.tt/2JioY9Y

How Covid-19 Affects the Housing Market in College Towns

The Covid-19 pandemic has led to major lifestyle changes. That could significantly impact the housing market in college towns, according to ...