When building my new shop, bringing in power was one of those things I drastically underestimated the difficultly of. I figured it would be the case where the electrical company would set a new box with 200 amps, set a new meter, then run wires from it to my shop.
Nuh uh. It was a multiple step process that was time consuming and expensive. I documented the entire process so those of you looking to build a new shop or house or anything else that will require running power, can have a general idea of the process and learn from a few things from my go round. Keep in mind, I live in the country and not within City limits, so the process will differ if you live within a City.
Okay, lets start at the beginning.

Where I built my shop, there is an existing power pole about 500 feet to the North so we knew we would be getting power from that direction. With that, when the slab was poured, Cody placed a sweep 90 in the slab on the side of the shop that was pointed towards that existing power pole. So that later all the wiring would have a spot to enter into the building.
Lesson to learn here: Cody placed the conduit but when the concrete guys started pouring, it was shifted and dried in a position so that it was no longer inside the wall plate. Meaning some of it is exposed inside my shop. So be sure to check its position once concrete is poured as the concrete guys will not.

Another lesson to learn from my experience: this is a very long process, so I recommend as soon as you have your slab poured, call the power company to get it started. I waited until I was putting siding on, which meant I was finished with my shop weeks before I had power to it, which was frustrating.
First step in the process was to call the electrical company to send an inspector out to the property. He and I walked around the location and chatted about the different options for placing a new pole closer to the shop. His advice was to keep the pole within 100 feet or so to the building so I wouldn’t experience a voltage drop due to a longer run. I picked out a spot I could live with, then he staked it as well as the anchor’s location. This is the cable off-shoot that will be placed to counter torque the pole from the previous pole.

Once a location was picked, I had to clear an easement for them that ran from the existing power pole location to this new one. Thankfully, I only had cedars in the pathway so I wasn’t opposed to the clearing but this might be a factor to consider when picking out your new pole location.
Once the easement was clear, the inspector had to be schedule to come out again to take a look before he would write up an invoice for the job. I would be charged by the electrical company for the pole, the anchor, and the install labor which amounted to $4500. Once I paid the invoice, my job would be scheduled in their books.
The inspector told me at this point that it would be 6-8 weeks before they would get to my job, but they actually arrived just three weeks later.

A drilling crew showed up with an 18” diameter auger bit and starting punching the hole for the new power pole. This took roughly an hour. They were in and out real quick. This crew was only responsible for the hole punching. They said a different crew would show up later to set the actual pole but were very closed lip about the time frame to expect.
Fortunately I only had to wait another week for the pole crew. None of these crews call before showing up, so one day I looked out my shop window and was pleasantly surprised to see the guys with two brand new power poles, one being mine. It was awesome to see them stand it up off the trailer, but then I went back to work as they did all the concrete work and the aerial connections. Overall it was about a three hour operation.

Alright at this point, the ball was in my court to keep the process moving. There was a new rule that took affect this year that says meters can no longer be placed on the main pole but requires a sub pole. However, the electrical company doesn’t handle this bit. The homeowner does.

If I lived in a location where it wasn’t solid rock, then I would have punched a hole with my tractor and auger bit, but I do live in a place with solid rock. So, I hired a guy who had a rock bit to come punch this hole and actually got his name from the electrical inspector. He does this work all the time, so he knows all the requirements and best practices to make the electrical company happy. The contractor came out, not only to punch the hole, but also brought a fully equipped sub pole with him, so that after an afternoon’s worth of work, I was ready to start trenching from this sub pole to the shop.
And besides the part of finally getting power, this was the best part.
Again, living in an area of solid rock I had to pay a contractor with the right equipment to trench a line from my shop to the sub pole. This guy shows up with a 6’ diameter blade that’s 10” wide. It was a beast. It was incredible. He would get the blade started, it picked up momentum, then he dropped it down and it just started eating away like it was starving and the rock was the tastiest thing it ever touch. To do 100’ only took the guy 45 mins, so this was a pretty quick step.

Okay, so part of this contractor’s fee was to not only trench the line but to place the conduit from the shop to the sub pole, then fill the trench back in.And just a tip, it’s a good idea to place an extra sleeve of conduit for future use while you’re at it, in case you ever want to run other things like cable or internet.
Nearing the end of the process now!
The next step was to pull the feeder wire to connect the sub pole to the shop’s panel. I helped out a little bit here and there but I mostly just filmed this process while Brian and Cody did the work needed.
To start the guys first ran a flexible piece of conduit from the sub pole to the panel and tied a pull rope to one end, then fed it back through. This is now what they will tie to the end of the feeder wire and pull it through.
Lesson learned here: whoever sets the conduit in the trenched line, be sure to ask them to run a pull rope in it so this step can be skipped.
The feeder wire itself is a giant spool with all four wires need, in one. It’s called a Parallel reel. This is a huge benefit because instead of having four different spools of wire to try and consistently feed from, all are placed onto one and pulled off easily. The guys propped the spool up on some Southwire spool jacks to get it off the ground and allow it to rotate freely.

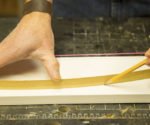
Another thing that really impressed me and the guys about this wire was the head Southwire made for it. They bundled all four wires together for you, making sure the loop on each end was was in line. They placed special crimped fittings on the end of each wire to make sure there were no snag points to get hung up once it was fed into the conduit, and they also staggered these fittings so the thickness of the pulling head was consistent.
It’s evident by looking at just this one thing, how much thought and effort Southwire puts into their products to make sure they are producing the best thing they can to make jobs in the field easier. This kind of attention to detail makes me proud to be working with a company who obviously has the field techs in mind.
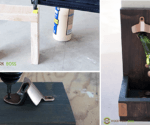
Alright, now the pull tape was tied off to the head of the feeder wire and the wire pulling began. Brian stayed outside to push, and Cody took inside to pull. While Southwire makes this task easier by coating their wiring in a jacket that is crazy slick, it’s still a task.

The guys worked in unison to make their efforts the most effective, yelling out when one was ready to go. Cody, being on the inside stood on top of my tool box to get leverage and use a lot of his leg strength to help pull. He also used a handy trick I had never seen before, where he would wrap the pull tape in a pair of square nose pliers, squeezing it between the handles, then wrapping it around the head a few times. This allowed him to grip the pliers sideways and have something a little sturdier to grab onto than just the thin pull tape.
Since he was doing this every time, he would yell out to signal to Brian when he was ready then they would both react.
Once the wire was all the way through the panel, the guys switched since Brian has more height and pulled out about four more feet. This will leave plenty of wire to make all the terminations inside the panel.
The final terminations inside the panel were up next. Cody did the ones outside while Brian did these inside. However, he did save the last one for me to terminate to the lug.

At this point the power company was back out to connect the sub pole to the main pole and Lord have mercy that was the final step to the process.
Since I didn’t have power for weeks but still wanted to use my shop space, I had been using an extension cord ran down from the pump house on the property to power all my tools needed. I had three, one to keep the lights on, then two to switch around from tool to tool. It was such an exciting thing to roll up all the cords and finally plug all my tools in, at once, to the wall. Having power also means I can now run my 240 equipment like my table saw, welder, and plasma cutter. Woohoo!
I hope this video gives you a general idea on what to expect if you’re going to be building something where you’ll need to bring in new power. Of course, rules and processes will vary slightly.
Below is a cost breakdown of my job:
- Electrical company’s bill for pole, anchor, labor to install and wire to previous pole and sub pole- $4,500
- *Note: the bill was actually $6,500 but they have a one time credit a homeowner can use that’s good up to $2,000. I have no idea why they have this rule but I of course applied it to this bill which brought it down to $4,500.
- Contractor to punch hole through rock and set sub pole – $1,100
- Contractor to trench, lay conduit, then fill back in – $1,500
So total I was out $7,100 to bring in new power.
Keep in mind that you might be able to save some money if you don’t have to hire two contractors to punch the hole for the sub pole or trench the line. However, if you aren’t comfortable with electrical work then an additional cost might be to hire an electrician to pull the feeder wire and terminate it to the panels.
The post Getting Electrical Service to My New Shop appeared first on Wilker Do's.
from Wilker Do's https://ift.tt/2OxB6GD


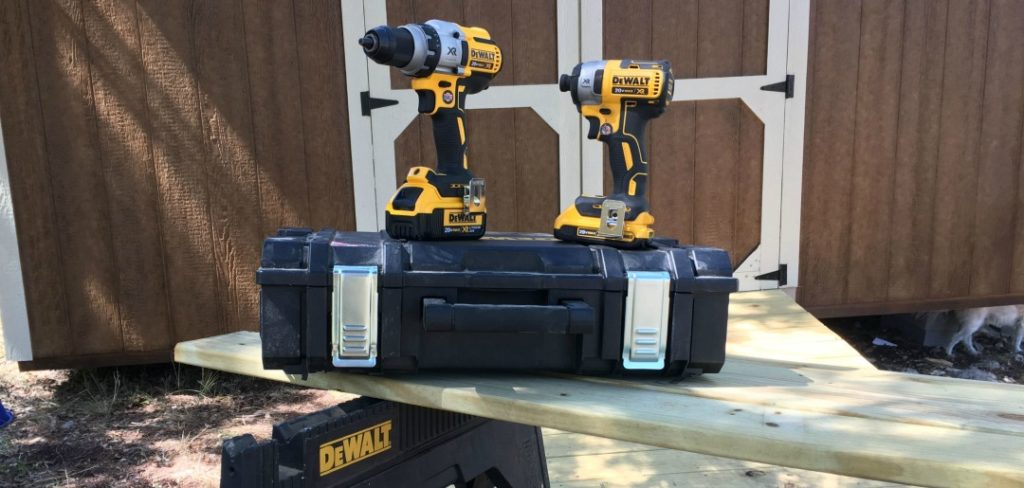
 Both of these little machines feature brushless motors. Brushless motors have really taken over lately as the technology is becoming less expensive to manufacture. The main advantage of a brushless motor over a brushed motor is longevity and efficiency. Brushless motors do not rely on physical contact of a current carrying “brush”. Instead, they use alternating magnetic fields to produce rotational torque against a permanent stationary magnet. Less friction = less heat = less wear = longer motor life. WooHoo!


 The drill is rated at 2,000 RPM and has three different speed settings raging from 450, 1,300, and 2,000 RPM. It also features a clutch wheel with 11 different positions to fine tune the break away torque when you’re driving something like sheet metal screws.


