
from Home Improvement – Today's Homeowner http://bit.ly/2SvfvQu


With it coming up on the holidays, things are winding down for me in the shop. I’ll be taking off a little bit of time to regroup from my extremely busy year and spend time with family…..It occurred to me earlier today that I built a 4,000 sqft shop this year, which is just incredable. It seems like it was so long ago. 2018 has been outstanding and I hope you’ve enjoyed coming along with me this year as I tackled a large assortment of projects. I wish you all a very Merry Christmas and a Happy New Year. But one last video for the year. As I was looking through footage I realized I installed fans earlier this summer in the shop but never released the video covering the process. So lets jump into it.
Fans I installed:
I installed two different kinds, inside the shop I installed a giant Big Ass Fan in the center of my woodworking space and four smaller Hakui fans on the covered porch.
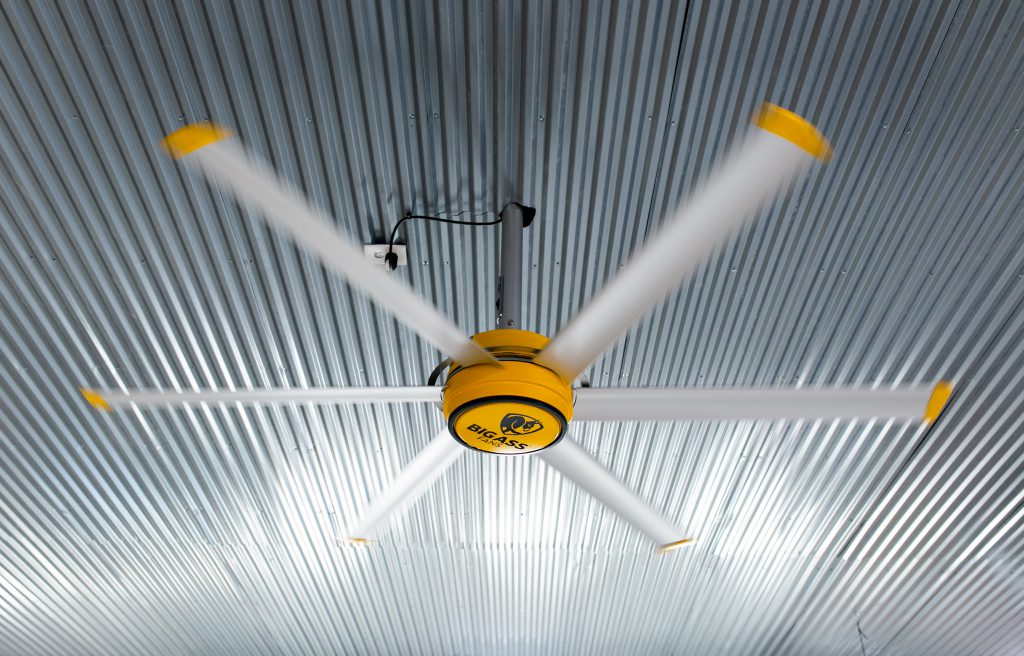

If you aren’t familiar with the Big Ass Fan brand, they make crazy efficient and stunning looking equipment. If you watched the shop build you’ll remember that I installed their lights. Since I wanted to place this 7’ diameter fan in the center of my woodworking space, I first started by taking out the light that marked center of my ceiling then also removing a few ceiling panels where the fan would need to go.

This size of fan requires a mount to be fabricated that will span across the bottom cord of two trusses which is why I’m having to take down the ceiling panels to expose the bones. If you don’t want or require such a large fan there are models that will allow you to attach the fan to one truss which would mean you wouldn’t have to expose the trusses.
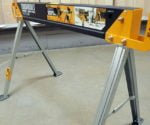
I fabricated my mount from two pieces of angle iron backed up to one another. I first cut them to the length needed to span two trusses then joined them together by drilling a hole dead center for a nut and bolt, using my Triton Super Jaws and a pair of vise grips to hold them in place for me. I repeated the steps in order to make two brackets at the same time.


After getting those punched I moved the pieces down to the ground, separated them, and drilled two holes on the flat portion that will be sitting on the truss.


With those together now I grabbed the hardware that will attach to these mounts in order to hang the fan from. I positioned it in center and marked the location of the holes that needed to be drilled out. When punching through metal I always work up to the final size hole if it’s somewhat large. So for these I start off with punching a 1/4” hole, then step up to the final 1/2” size which is the bolt I’m using.


Once I got those tighter I ran the wiring through the center tube for the electrical bits then dropped that down in the center of the mount. Now it was ready to set into place. To keep it from moving I temporarily clamped it in place while I crawled up top and attached it with lags to the bottom cord of the trusses.


Something I really love about this fan is the wall mounted remote, it’s more of a speed indicator as it not only turns the fan off and on but also dictates how fast or slow it spins.

I didn’t want to run the wiring on the outside of my ceiling material so that meant I had to crawl up into the attic….let me remind you this during the heat of summer!….and get into the tiny tiny point on the far side of the roof in order to feed down the wire to Brian. My recommendation is if you are building a shop, even if you don’t install fans at the start, leave yourself a wire from where you’ll eventually want the controller to the placement of the fan. Just coil it up and leave it in the attic so you don’t have to do all this crawling around.
Alright, next up was mounting the motor into place, which might take two people because it’s pretty heavy.


Next up was mounting the airfoils. These do come in different diameters but mine are 3’ long, which including the center hub span, makes this fan 7’ total. And let me tell you….it’s crazy how much air this fan can move, and also how still and quiet it is. Even when I crank it up all the way you don’t hear any sounds from it other than the air itself moving.


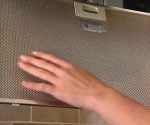
And that’s it for the installation part of the big fan, so next was throwing back up the ceiling panels that were taken down earlier. To get around the fan’s stem I used a rotary tool to make a cut around it.

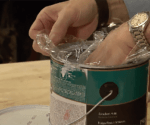
While I was mounting fans, next I moved to the porch. I love working on my covered shop porch when the weather is nice enough so having the option to get some moving air out there was a must for me. For this area I’m going with a smaller Big Ass Fan called Haniku. These fans have over 1000 options for finishing combinations but I went with Carmel and Black to match the cedar beams I have on the porch.

These fans are ultra quick to assemble. It was honestly as simple as attaching the fan blades, attaching the center tube with the wiring in it, then adding both hubs that keeps the top and bottom ends of the tube looking nice once it’s mounted. 

Haiku has won more than 75 international design and technology awards and one thing they strive for and hit, is ensuring their fans don’t wobble. I found out they have a 13 step process to hand balance each fan so you won’t have to be distracted by the repeated off balance rhythm so many fans make.


After I mounted the bracket on the ceiling where I wanted the fan, I placed the ball into the socket, that’s what I’m describing it as at least, and turned it on. These fans also come with a remote and allow you to control the speed. Ha we were laughing because there is an actual “whoosh” button : )

Also, big high five on not only the quality of the fans, but also the instructions, and even making the remote magnetic. Just from head to toe, from aesthetics to function, everything on these products screens thought, effort, and quality.
If you’re looking at mounting fans in the shop or even in your house I can’t recommend these enough. They are highly efficient, exceeding the Energy Star requirements for ceiling fans, extremely quiet, and have a customizable look for every space.
If you’d like some of your own, check out the Big Ass Fan website here.
And while you’re checking things out, check out April Wilkerson merch here.
Ok, that’s it for 2018! Not only was I able to build my shop this year, I was able to put a big dent in my to-do list for outfitting and personalizing it. And that’s a great feeling. Thanks for coming along.
I’ll see you in 2019.
The post Installing Shop Fans – Big Ass Fans appeared first on Wilker Do's.


Things I Used in This Project:
ISOtunes Bluetooth Hearing Protection
Titebond III Wood Glue
Miter Saw Stand Plan
Miter Saw
Infinity Table Saw Blade
Infinity Miter Saw Blade
Woodpeckers Speed Square
Armor Tool Pocket Hole Jig
Woodpeckers Straight Edge
Woodpeckers 12″ Square
Triton Track Saw
Brad Nailer
Titebond Thick and Quick
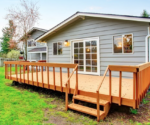
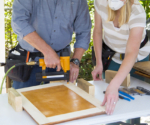
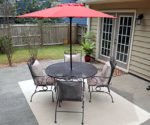
When my dogs aren’t with me in the shop, they are hanging out on the wrap around porch which has plenty of shade, is out of the rain, and always has a great breeze. During the summer it’s awesome because they stay cool but during the winter it’s hard for them to get warm. So this week I built them a dog house with the purpose of giving all three of them a place to get away from the wind and snuggle up. Let me show you how I did it.
This will be an insulted dog house so instead of going with my first instinct which was a plywood body, I went with more of a framing design made from 2x4s ripped in half. I first sent the 2x4s through my table saw to take off the rounded edges on both sides, then readjusted the fence and cut them directly in half.

After getting them cut to width I then cut everything to length at the miter saw.

I started by constructing what will be the two sides, coming up a few inches on a few pieces to give the house some small feet and get it up off the ground. Again, mine will be under a porch and should be kept dry but just incase.
I’ll be using pocket holes to join things together and I’m very excited to introduce a new jig to hit the market that has some really great features.It’s the Armol Toos Pocket Hole Jig. Right off the bat they made the deck of the jig the same height as a 2×4 so it’s easy to create side support feeds. Of course I don’t need them in this instant but this will come in handy. So on a traditional pocket hole jig you have three things to adjust, the drill block, the clamping tension, and the drill bit collar….on this jig all of those things are self adjusting so all you have to do is stick in your material. If you want to go from 1 1/2” to 3/4” you just clamp the new material into place and you see everything automatically adjusts for you. You can use the onboard Allen key to tighten down on the drill bit collar then you’re ready to go. If you want to double check, there are indication markings on the side annnnd they are color coordinated to the length of screw you need for that thickness of material. Pretty sweet if you ask me.


After getting all the pocket holes drilled, I started attaching things. Even though this house shouldn’t ever see moisture it will be outside so I went ahead and used Titebond III wood glue since it’s a waterproof glue.
 After getting one side assembled, I repeated the process to create another. Next I started working on the front panel, first cutting everything to size, drilling in pocket holes, then gluing and screwing it in place. This design is very easy to adjust depending on your size of dog. Since I have three and they all like to snuggle up together, I made this one long enough to fit three of their beds but still give them room to get around one another.

After getting the door in place, I thought I should double check to see if they could comfortably fit. With that test passed, I moved on to attaching the back panel. Moving things to the floor to have more working room.


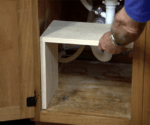
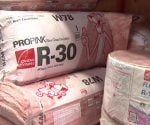
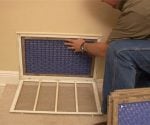
Next up was a floor, but before putting in the decking material I threw in some insulation. This comes in a big 4×8 sheet and is 3/4” thick. Since my framing is 1 1/2” thick I cut two panels per opening and doubled filled up the cavity. I would use a straight edge and a box blade or my pocket knife to cut it out, then stuck it in place.


Once the bottom was full I measured and cut some plywood to deck it. I ended up cutting this piece in half to make getting it into place a little easier and I just made sure to cut it in the center so I could join the seam to the floor joist.

And now more insulation for the walls! To make this step easier I would cheat and set the panel directly on top of the foam then just trace the shape I was needing. If you’re working alone, you can set the insulation on the floor so you have less travel distance to move the entire house. I would line one of the straight edges up to the edge of the insulation then trace the rest, cut it then stick it in place. I was originally thinking I would need to glue these panels in place but the friction fit was so snug I skipped the glue all together. Oh and just a reminder this insulation has foil backing on both sides so if you want to use your table saw to cut it down, and have a SawStop then just be sure to put it in bypass mode or it will tip right away.

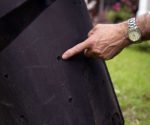
The set in place and tracing method worked so well I next repeated it for the siding! For the siding I’m going with beadboard. This stuff is a huge pain to paint but it does give it some good texture and it’s pretty lightweight, only being 3/8” thick. As you can see I dragged the full sheet over to my work area, then set flipped around the house in order to trace all the sides. If you do this of course just make sure a horizontal reference is squared up to the headboard so your panel doesn’t come out wonky looking.

After getting the sides traced I used my tracksaw to cut all the shapes out then Titebond III and brad nails to stick it in place. I started by attaching the two side panels so that when I cut and attached the front and back, the edges of the side panels would be covered up.


On the front panel, I went ahead and covered up the opening to the dog house with the bead board, but then after getting it secured in place I used a large drill bit to punch a hole through. Then I used a router and a flush trim bit to perfectly cut out the opening. If you don’t have a router then you can also use a jigsaw or even a reciprocating saw to do this.

Now moving on to the roof. Since the dog opening is muuuuch smaller than me, I wanted to make the roof into an access panel to the inside so I decided to make it hinged. This will allow me to easily grab the beds to wash, check for snacks, or anything else. I decided to use the left over beadboard I had from the siding to create this roof and also decided to split it into two doors instead of just a single. This is fine for mine since it will live under a covered porch but if you plan to place your house in the rain then keep it as a single panel so rain won’t drip through the seam.

Before attaching things, I set the roof panels aside and gave everything a coat of paint. Like I said before, beadboard is not fun to paint because it takes two forms of application. I would first use a roller to get all the flat surfaces, but then used a brush to get into all the valleys. Looking back on it, I should have used my sprayer, that would have saved me a ton of time, but oh well. For the body I am going with a grey and while it was drying, I also grabbed what will be the trim boards and threw a coat of paint onto them as well to be drying. Instead of white, I’m going with a light grey.

While those were drying, I started attaching the roof panels. I started by centering and squaring up the panels to the body. Once I had it just so, I used a pencil to trace the underside of the panels. This line indicates the outside of the body, but since I want to also insulate the roof I needed to know where the inside of the body fell on these panels. With the framing being 1 1/2” thick, I grab something that was 2” thick, which just happened to be a level, and used this to mark the inside line. Now that I had this reference I could measure the area inside and cut a piece of insulation to size. To attach these panels Im’ using a multi surface glue made by Titebond called Thick and Quick. Since I could use brads to hold it in place while that dried, I grabbed an assortment of tools and just weighted it down for a bit.


While that was setting up to dry I started working on the trim. I ripped down my 1x boards I had painted earlier then started cutting them to length and attaching them. Glue doesn’t stick very well to painted surfaces so learn from my mistake and leave the top edge of your body unpainted to give you a clean surface to glue to.

I’m again starting on the edges of the house so that the front and back trim will cover up the end grain of the side trim. I also always cheat on trim. Instead of measuring and cutting I typically just hold the board in place and mark the back side.

By this time the insulation was well past stuck in place so I first attached a portion of paino hinge to the underside then crawled inside the house and attached it to the body. And I should have seen it coming but to be honest I didn’t think about it when I was working the design….but the door actually has a built in stop with the overhang on the back end. So that’s convient. : )

Nice, that works nicely. After getting one secure, I repeated on the second. I used the Tounge and groove feature of the beadboard to make the seam in the middle disappear. This is great except when I tried to lift up one without the other, it was running into each other and prevented it. To fix this issue I grabbed my multi tool and just notched out a small portion in the back so that I could open one and give it clearance to pass up the other. There we go, now it’s working correctly.

Next I did all the finish painting to the inside, the underside of the roof, and any other exposed wood. Now when I was trimming around the door I left the top piece of trim long so I could hang something cute and special. I used my CNC machine to cut out a cut little paw print and instead of just glueing this to the side, I instead added a small hook to the overhung trim and the paw so that I could hang it and there would be a slight swing to it. Hehe, I think the dogs will appreciate the marking.


I thought I was done but the roof was really bothering me with how thin it looked compared to everything else. So I ended up ripping some 1/2” plywood and adding a small strip around the primereter of the underside of the roof. This just bulks up the look some and I think makes it looks better.

And that’s it! Now the pups have a place they can crawl inside to get out of the wind that’s always present on our hill. They can all be together which will make them happy, but still have room to get around one another. Also, I have a way to peak in at them to make sure they aren’t staying up late and ordering pizza.


So a few followers on my Instagram page were mentioning their dogs would tear up the exposed insulation on the inside. Mine don’t chew or scratch things up, but if yours do then I would certainly recommend adding a layer of thin sheeting to the inside as well. Don’t forget I have a set of plans for this build in the plans section of this website.
That’s it for this one, I hope you enjoyed it.
The post DIY Insulated Dog House appeared first on Wilker Do's.


Things I Used in This Project:
Woodpeckers Speed Square
Woodpeckers Straight Edge
Woodpeckers 12″ Square
Bandsaw
ISOtunes Bluetooth Hearing Protection
3″ Sander
RIDGID Round Shop Vac
Universal Small Port Hose Kit
Dust Right Separator
Titebond Original Wood Glue
Rockler Surefoot Clamps
Triton Router
Infinity Spiral Bit
Carpet Tape
Triton Router Table
Infinity Round Over Bit
Spray Lacquer
I am starting off the with the three legged stool that goes all the way to the ground. These are made from 3/4” plywood and kinda have a spoke sort of design to support the legs. A smaller spoke at the very top that connects all three but will also give me a flat surface to attach the base to the seat later on. Then another, larger spoke down the legs to support the base some and also give my feet a place to rest.


I took the time to 3D model the stool first so I knew exactly how big I needed to make everything, then use a few woodpeckers measuring and marking tools to draw it out on good size cut off of 3/4” ply. However, if you are interested in making your own, I do have a free download for both spokes available here.

Once I had the spoke drawn out, I took it to the bandsaw to cutout. If you want to make more than one stool, I recommend cutting material for the number you want, then taping them all together with painters tape. This way you can cut the pattern once but make the total number of spokes you need with it.

Next I took the left over cut off to the table saw and cut a few legs. Since I want the legs kicked out like this instead of straight up and down, I used a speed square to mark off a 10 degree angle on both the top and bottom, then again used the bandsaw to cut these angles out. If you do this, I recommend grabbing the miter gauge and setting it to 10 degrees so you can get a straight cut rather than pushing it through my hand.

Then last cutting detail for the legs is I added a small taper so the top of the leg would be chunkier than the bottom. After coming in at the bottom, I used a straight edge to connect it to the top and also cut it out using the bandsaw. Now you can see the slight taper this gives the legs.

Alrighty now to clean these parts up. I moved my new dust collection cart over to my workbench, hooked up shop vac, flipped my belt sander on it’s back, then started smoothing out the edges on all my parts.

I originally thought I would paint or stain these bases a dark brown because I honestly want the seats to be the focus. However, I really started to dig the look of these plywood parts and decided to leave them as raw looking as possible. But before moving into finish I stuck a round over bit into my router table and ran each part through.

And that’s the majority of the project done. This is a super quick one but looks great in my opinion. If you’re needing seating for a bar area, garage, or shop then don’t put it off because you can easily knock this out in a single day.
For assembly, I started off with the smaller spoke at the very top, and placed Titebond original in all the cut outs, then shimmied the legs one by one into their spot.

After getting all three in, I repeated with glue and placement of the larger spoke. I placed this one at a height that was comfortable for my feet to be propped up on. After getting it roughly where I intended it, I use a small level to make sure it was level across all three legs. Checking to make sure my workbench was level first, before using it as a reference for the spoke.


After letting those sit up over night to dry I went ahead and took my belt sander to each top just to clean it up a bit and make sure it was nice and flat.

Then last thing before attaching the seats, I cleaned off each one and gave them four coats of spray lacquer. This hardly changes the tint or shade of the plywood so it stays that raw look I was going after, but does give it some protection.

With the seats being made from solid wood, I didn’t want to just screw the base directly into it, and I was planning on using those Z clip or figure 8 fasteners but a buddy suggested I drill an oversize hole through the base for the screw to pass through, then add a washer to the head. The trick is you don’t want to over tighten the screw so that the washer can’t move. By only tightening down enough for the seat to be secure but allowing the washer to move freely, the seat can move if the wood wants to. I liked this method as it meant I didn’t have to wait on ordered hardware so I tried it out.


That’s one! And I must say, they feel pretty darn secure and I was/am really happy with the way they came out. I honestly never would have thought I would end up liking the raw plywood base look as much as I do. Next I repeated until all four were secured and sittable.

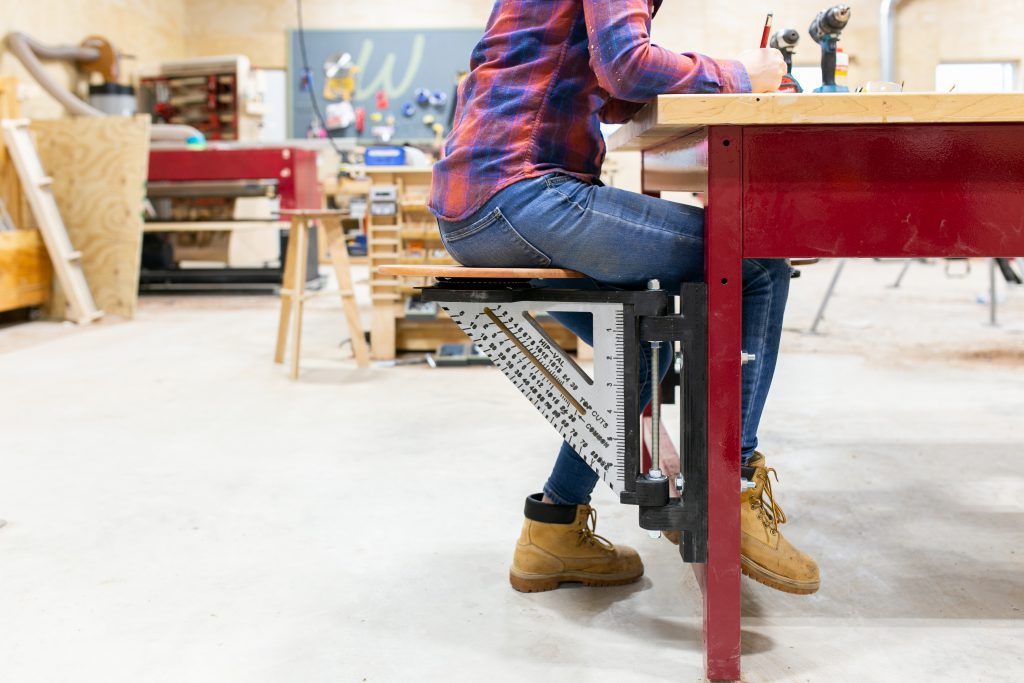
With those knocked out, lets get to the more complicated but fun one shall we? For the four remaining seats I switched gears completely and made some swing out swiveling shop seats that have a supersized speed square design as the support. That’s 9 Ss if you weren’t counting. ; )
I thought of a speed square only because the shape lends itself so perfect for the supportive base. I recently added a 4×8 Laguna CNC to my shop ….I’ll be putting out a stand alone video on that soon, so stay tuned for lots of details.
Since I wanted the speed square to be two tone, I first painted a section of plywood silver then after it was dry, taped off the silver portion before setting the machine to carve out four squares.


Each seat is made up of two that will be glued together. Once the engraving pass was complete I spray painted the markings black then set the machine to cut out the empty spaces and perimeter.


After getting the squares cut I then had the tedious task of pealing off the tape. I thought this would come off in a few big pieces and have this awesome reveal for y’all, but it didn’t. So I’ll skip to the end and show you the results. Pretty cool huh??

Like I said earlier, each seat is made up of two squares glued together so next I applied glue to the inside face and set weights on it until dry.


Next up was making a flange that will rest on the top of the square assembly to give a flat surface for me to later mount the seat to. This is also made from 3/4” plywood, and I started by cutting a wide board at the tabelsaw then using a square to mark the center of the board so I could cut in a stop dado wide enough for the square assembly to snuggly fit into.

Since I didn’t want this dado to go all the way from one side of the board to the other, I set up a straight bit in my router table to make this cut. I clamped a scrap into place on my router fence to act as a stop for my workpiece, then also set the fence’s depth away the blade so the dado would start where I needed it. After a few passes I got to the width I was needing to slip the square snuggly into place.


So far so good but lets refine it a little bit. Instead of having just a big rectangle, this stop dado dies off in a curve that will later be used as a pivot point. Then I also marked off the sides so I could remove the bulk wood here and slim down the profile in order to create kinda pedestal on the end where the seat will later go. After marking off a shape I liked, I took it to the bandsaw to cut out. Moving the fence to the distance needed to get a nice straight cut.

While at the bandsaw, I also taped together some small pieces and made the same rounded shape that I did on the end of the stop dado portion to create some reinforcement pieces for the pivots points. I glued these parts together to be drying while I moved on to cleaning up all the parts I just made, on the belt sander.


Then it was time to start assembling, For this I’m using Titebond original once again, since this seat is inside. I applied glue to all the dados then started sticking the pieces in their place. First placing on the top flange with the seat mount, then the back portion then the doubled up pivots. I stuck that in clamps the best I could, then set it aside to start drying.


While I was waiting on that, I started cutting and build a mating mount that would attach to my workbench leg and give me a way to connect this square assembly to. This is also made from plywood, but I’m thinking of doing another rendition in the future where I keep the wooden square but make the rest from metal.

After getting the first portion of the mount glueing up, I took the down time to start painting the square assembly. I painted the entire frame black then the rest of the speed square parts silver. And just a tip for you: when only working with a rattle can paint but not wanting to take the time to tape off anything and everything that doesn’t need to get painted, I grabbed a foam brush and sprayed some directly on it then dabbed it on. This has saved my neck a few times and works really well.


I let the paint dry then used this finished assembly to mark off where on the bench mount I needed to place the second pivot point. I did it this way because I wanted to make sure it was the tightest fit as possible. Once I had the location of the second tabs sorted, I added a few more reinforcement pieces then set it in clamps to dry before throwing on a coat of paint so it would match the other.

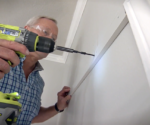
Alright, now it was time to drill holes for all the hardware going in this thing. I’ll be using a piece of all thread at the pivot point so I started by drilling these holes. The important thing here is that these holes on in line with one another so I used some simple wooden block as a drill guide. Also, I do recommend drilling these at a drill press but mine was giving me issues and I didn’t want to stop and mess with it so I did these by hand.


Next I drilled holes through the back and these will be for the bolts to connect it to the workbench leg. After getting these drilled through the wooden mount, I clamped it to the workbench and drilled the same holes through the leg. I placed this on the inside of the leg so that the seat could fold up under the bench when I’m not using it and be completely out of the way.

Now onto all the hardware, like I said before I’m going with a piece of all thread to connect everything and create a pivot. There are also some nuts, washers, and bolts thrown in there. Oh and just a tip if you do this, I would chuck this up in a drill and use it’s power to help get the rod all the way through the pieces.


Next I mounted it to my workbench then tested it out. You can probably imagine, it was prreeety nerve wracking sitting on it the first time. Ok….things held together so I moved forward with mounting a seat on it!

I order some swivels so the seat would rotate independently from the base itself. I first attached this to the mount with some screws and washers, then set he seat in place, and attached it to the underside. And that’s it!


Oh and on this second one, you’ll see it’s mounted on the end of the workbench instead of the long side like the other….that’s because the apron under the workbench is so much lower on this side, my knees would have been knocking into it. Which is fine, now I’ll have a seat I can use on the end as well as the long side.

I love the way this project turned out, I think it’s fun and pretty darn cool. Overall the seats do feel good, but of course they haven’t experienced much use yet so we’ll see how well they hold up. If they end up failing then I’m going to explore making the mounting portion out of metal instead of wood. Of course if I make modifications I will be sure to bring a camera along to show y’all. april, April wilkerson, DIY, diy project, diy projects, diy shop project, diy stool, do it yourself, female builder, female carpenter, female woodworker, home improvement, how to, how to build, saw blade storage, Scrap wood, Scrap wood projects, shop project, triton tools, Wilker Dos, wilkerdos, woman builder, women who build, wood, wooden stool seat, woodshop stool, woodworking project, woodworking shop, workshop stoolI’ll see you on my next project.


I have a fresh batch of plywood mallets now listed on my website. If you’d like to pick one up for your shop, then check those out here

The post Building Swing Out Stools + 3 Legged Stools appeared first on Wilker Do's.

