Creating a mini greenhouse is the perfect way to balance spring planting with Mother Nature's harsh temperatures. Watch this video to learn how to make one!
One of the challenges of many woodworking projects is, how do you hold your parts steady as you're assembling them? Watch Joe Truini's Simple Solution!
Stain failing on garage floors, stainless steel deck nails becoming rusty, and an air conditioner that’s just not performing well on the second level — these are some of the problems that people often ask us about.
We’ll answer those questions, and many more, on this week’s Today’s Homeowner Radio Show.
Here is a collection of Tape Measure Tips and Tricks that I personally find useful and worth sharing.
Tip #1:
When trying to divide a board into equal sections, but the overall dimensions are not easy to divide, tilt your tape to a number that is easy to divide and then divide by the number of sections you are wanting.
I want 3 sections so I picked 15″ to divide by. Then I placed a mark at 5″ and 10″. Now I have 3 equal parts.
If I wanted 2 sections, I would tilt my tape to land on 14″ and mark at 7″ to find the center.
Tip #2:
If you don’t need to be as precise as above, take the overall dimension – this case 14 11/16ths. Then get close on both sides such as marking 7″. Now you can narrow the filed to eyeball a close enough center.
Tip #3
You don’t always have to hook your tape. Burning an inch and then starting at the 1″ mark instead of 0 will give you a really precise measurement. Especially if you are in a situation where you can’t hook your tape. Just remember to subtract and inch from your final measurement.
Tip #4
When you have repeated measurements, instead of trying to remember them from board to board, use a dry erase marker to mark your tape. Then you can quickly mark all boards needed. After you are done, the mark can easily be wiped off.
Tip #5
It isn’t precise enough for fine furniture making, but in a lot of cases, using the edge of a tape is a great straight edge for quickly making lines.
Tip #6
When you are just needing something roughed in, the tape can also be used as a quick marking gauge. Use your left hand to determine the measurement and butting the tape up against the wood and then use a pencil against the end hook.
Tip #7
Remember that the end of your tape has a metal end hook. So, if you ever need to extend your reach to pick up something metal (such as the nut from your table saw), a magnet, stored on the side of your table saw, can quickly be placed on the end to pick something up.
Tip #8
It’s hard to accurately measure between on the inside of corners, such as the inside of this door jam. Instead of guessing, pull your tape from one side and mark an easy number such as 10.
Now measure to the other side from your mark and add 10 to that dimension.
It’s worth noting that this Lufkin Tape body is exactly 3″ long. In situations like this, you can pull your tape until your body is butting up to the other end and then add 3″ to that dimension.
Tip #9
Don’t have a notepad? Or a good memory? A small free sample of formica is a ready made table that just needs to be cut to size and stuck to your tape with either hot glue or double sided tape. Pencil marks can easily be wiped away for the next round of measurements.
Tip #10
Sometimes a tape isn’t the best method. There are plenty of times when holding a marking a board in place is not only the quickest but most accurate way to get a measurement.
Tip #11
I recently switched to using Lufkin tapes and one feature I am loving is using this through hole for marking curves or circles. You can place a nail through the body of the tape, then attach a pencil to the hook and it’s quick work to get a clean circle.
If you are using a tape without this feature, the alternative way would be to set a nail or screw and then hook the end of your tape. Then do your best to keep your pencil on the measurement ended. It’s doable but definitely not as easy.
Tip # 12
Here’s two ways for determining square: If you only have two sides then the 3, 4, 5 method is easy. You measure to 3′ on one side, 4′ on the other side and then the hypotenuse (or the measurement from point to point) should be 5′ exactly. If it’s not, you can adjust. This also works with 6′, 8′ and 10′.
Tip #13
If you are building a box, the diagonals from corner to corner should be equal. If they aren’t, you an tap the long end until both measurements are the same.
Now, on a tape measure, I’ve always known that every foot is clearly marked, as well as every 16″ for doing framing on 16″ centers.
I recently learned that the small diamonds are for dividing an 8′ span into 5 equal parts. This is handy if you are trying to break down sheet goods.
I thought all tapes were the same until I tried out these Lufkin Shockforce tapes. It is incredibly durable. I can withstand a 100′ drop and only produce a few scuffs. Everyone has two metal guardrails to protect the lock button and a diamond coated end hook for superior gripping.
Then, the tape itself is so rigid that it can repeatedly hold up to a 14′ stand off.
The Shockforce comes in two styles: the traditional coloring style but also a cool Nite Eye version. Both are extremely easy to read with larger than standard print for the numbers, a matte finish that prevents glare and also a contrast background on the foot markers.
I don’t typically work in dim lighting, but it is nice to know that if I were in an attack, a crawl space or on a poorly lit job-site, then the unique coloring of the Nite Eye would give me clear visibility. In fact, I think I even prefer this coloring vs the traditional.
I know I’m going on about a tape measure, but the thoughtful design behind this one makes it worth it. After all, it is everybody’s most used tool.
One last feature I love that I want to point out is the double side tape. The backside has vertical markings that are easy to read when pulling from the ground.
Hopefully you can put some of these tricks to use in your own shop and if I left any of your favorite out then please leave it for me in the comments down below.
Here's how to repair and seal cracks in a concrete slab, such as a driveway, to prevent water from seeping beneath the slab and causing the soil to erode.
Home and garden centers, along with building materials suppliers and hardware stores, have seen a year-over-year sales increase due to home improvements.
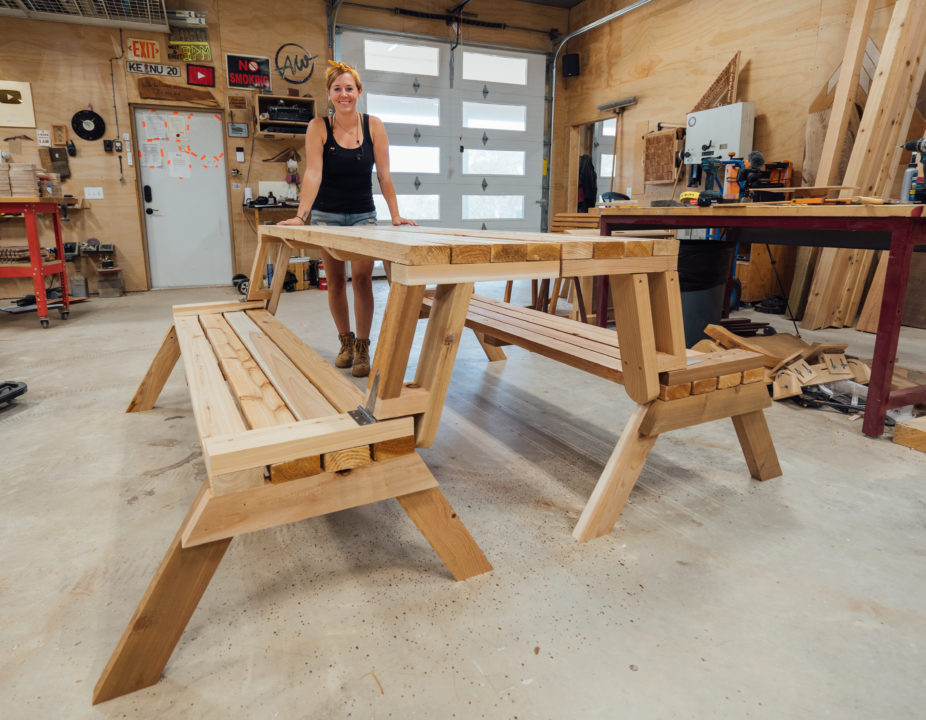
Hey watch this….is it a bench, or….is it a table?….or is it a picnic table? I saw one of these convertible benches and just had to make one. I love the concept of having two seating options that can quickly turn into a table. It’s perfect for outdoor spaces like porches. Let me show you how to make this one.
For this project I’m actually using the left over cedar 2x4s I have on hand from building a fence. So I started by off loading them onto my Armor Tools mobile workbench to get them ready for building.
Personally, when I work with cedar, I always run the boards through my thickness planer first to remove the roughness and save on sanding time later on.
Then I moved all my boards over to the miter saw to start cutting up into the needed pieces. If you’re interested in a full cut list and material for this project, I have plans linked for you down below. Since I was going off my cut list within my plans, I was able to process all my boards at the same time.
Just a tip for you, I always move my workbench in line with my miter saw stand so I can pull material directly off and into position.
Ok lets start assembling! This bench will be for kiddos so it’s lower to the ground, but know that you can very easily raise it up higher for adults. I grabbed what will be the two legs and the stretcher that connects them and started putting them together. You can see I used a scrap near the bottom to make setting the legs in place, easier.
I applied some outdoor wood glue then once the top was flush all the way across, I used a countersink first then drove in two screws per leg. After attaching the first, I repeated on the second. Then I made another assembly identical to it for the other side. If you’re making both benches at the same time, then you would make four total.
I set those aside and got started on making the bench seat. For this I laid out four 2x4s on my workbench and lined up the ends flush to each other. I first found center of the bottom board then started attaching a center support member. Again using a counter sink first then driving in screws.
After attaching it to the bottom board, I moved to the top board and repeated. Note, use a speed square to ensure you’re attaching this board on at a 90. Now that I had the top and bottom attached, I cut a spacer to make spacing out the remaining boards equal. Then I went back to the center and attached the center support to these middle two boards as well.
Now lets attach the two! The ends won’t want to stand up on their own so I grabbed some clamps to increase their footprint and this worked like a champ. At least well enough for me to grab the bottom and set it into place.
Next was to attached them together. I first applied wood glue then used screws in all the boards to go into the leg assembly. Note: I recommend using a square to ensure the leg is not only square to the bench’s seat but also vertically from the ground.
After checking both planes, I drove in the screws on both sides. Again using my spacer to make sure everything was nice and even.
Alrighty, now lets add the left and right supports that will join the bottom’s boards together and stiffen up the seat.
Easy enough, moving on to making the top!
This is almost the same as the seat except it has more supports in the center of it. So I first laid out my marks according to my build plans then set my boards in place. Once I confirmed that it all looked equal I attached them in place.
Ok almost done. Now on to the arm assembly.
I first cut the two pieces that make up the bottom and the front of the arm then used my Triton Superjaws to join them together. It’s worth noting that I first only used wood glue and screws here but later came back and added some dowels to reinforce the joint some.
Once that was put together, I added a strap hinge. This is the part that will allow the bench to convert into the table by folding up.
After getting it attached to the bottom of the assembly I moved to the top and added on what will be the back. This is also the part that will allow me to attach this entire unit to the back itself. I set it in place, then used a clamp to secure everything down while I drove in screws.
Lets set this in place now and figure out where it needs to be set in order to fold forward and work properly….
There isn’t an easy way to set it in place to mark the needed screw locations without it moving. So I ended up cutting a scrap to length so that I could flip the top forward and it hold it in place for me.
This worked beautifully. Once it was forward I was able to use a countersink and screws to attach the hinge in the needed location.
It isn’t completely done yet but lets try it out! Ha, that’s pretty neat huh?
Ok, last part that’s needed is the arm! Simple enough. I grabbed a roll of tape off my workbench and used it’s curve to trace a round shape on my 2×4 then cut it out over at the bandsaw.
Now this arm can be attached to the entire assembly.
If you build this, definitely follow my plan instructions and not what I did here. Remember that I’m building things for the first time when I make videos. So as I build, if I see something that can be refined, I make the change in my plans for the people who want to replicate the project.
So anyways, it would be much better to attach the arm in place before the entire arm assembly gets attached but I made it work by using my Armor Tool pocket hole jig and connecting it that way from underneath.
Ok lets see how that works. So it’s a bench that can be tucked on a porch but then easily converted into an eating station in just a few seconds. Then if you go through all the steps to build an identical second, they can be move together and turned into a larger seating area that could go back to two benches after all the festivities are done.
I personally don’t think these will get moved together very often, but the fact it’s another option is pretty cool. Remember if you want to build your own then I have a set of plans over on my website to download. Also if you’re interested in outdoor furniture then check out my Plans section here on my website where I have plans and templates for tons of other projects such as a Folding Adirondack Chair, Rocking Chair, and Porch Swing!
First, lets attach the top cap. This is the board that stretches horizontally from the top of one post to another and is really straight forward to attach.
You can basically throw the board up on top of the post then drive a few screws into the top rail to hold it in place. One thing to pay attention to is to not pull or push the posts out of straight. Again, here is where a string line can be useful.
We once again set it from the very end of the fence to the start but this time, up top. Then we referenced off the string line by 1” to set all the caps in the same line. This top cap will not only help stablize the top of the fence posts by tying them all together, but also looks nice. It has an overhang on the front in order to give the final fence some depth and texture when complete. The amount of overhang can be customized of course, depending on what you think looks nice.
Now on to the major step of adding pickets.
With a board on board, the goal is to have 100 coverage and no visibility through the panel. The order of operations is I first laid down the back layer of pickets, these are attached directly to the posts.
Then I came back and attached the top layer. These are nailed into the bottom layer of pickets that they overlay on the left, right, and also the center support. Each picket getting two nails per position, per picket.
I went ahead and did up the first bay of the fence completely to make sure my spacing and technique was going to work out. It looked great, in my opinion, so I carried on.
To make things more efficient though, I did the pickets in stages. Meaning I went down the entire length of the fence and first only focus on attaching the back layer of pickets first.
A few things to keep in mind if you’re going to replicate this project: I used a level when placing the top most picket then also would check about every 4th or 5th as I moved down a panel, just to make sure I wasn’t getting off. If you find you are, just cheat it back into level on that picket if its just a small amount, or over the next few pickets if it’s a large amount.
I made a spacer to the needed gap height and this takes out almost all the thinking on this step. It’s key that the spacer is made from something straight, so I grabbed some plywood and ripped it to the needed height at the tablesaw, then attached a handle.
The gap you go with will be determined on how wide your pickets are, but you want to aim for 3/4” overlap on each side of the picket. This will ensure that as the pickets shrink, no gaps will appear in the fence line.
As I said before, the pickets are attached with two nails at the three different locations. One thing to note here is to buy stainless steel ring shank nails. The stainless steal will prevent your fence from developing those discolored water marks and the ring shank will prevent them from backing out over time as the wood moves. For attaching them, I think investing in a nailer is 100% worth it. I purchased this one three years ago when I tackled my last fence and it’s more than paid for itself. I can hold down the trigger and just bump the head into the picket for it to shoot a nail. I actually ended up timing myself and it was taking me roughly 4 mins per panel with my process.
When buying pickets…I went with Western Red Cedar for this entire build. If you’re interested in finding a dealer near you, you can find one HERE!
Not only is the material beautiful and has naturally rot resistant qualities, but these pickets are 3/4” which are considerably thicker than standard. Normally when buying a large bundle of material, there are several pieces that have to be weeded out and discarded but I didn’t have a single board that was unusable in this project, which was a first for me.
One thing that sped that up though was Jake and Justin (who is my videographer) would stage the needed number of pickets at the different bays. This not only saved me time but also my energy. Even though this is a simple step, it’s the middle of summer and is very draining on the body. But after making it down to the end, it was back to the beginning to start phase two of picketing.
Now this stage was actually the quickest of the entire project because Jake came up with a very clever jig to speed it up drastically. He grabbed a 2×4 and made some steps, or some shelves I guess, at the needed distance of the pickets.
This jig could be clamped into position on the left of each bay where the small shelf was resting on the center of the bottom layer picket so that the top layer picket could simply be set on top, manually positioned left or right, then nailed down. Jake could feed in the pickets while I attached my side of things, then before moving the jig, Jake could go through and quickly secure his side. Then the jig could be unclamped then moved down to the next seam and repeated. This took took the time down from 4 mins per bay to under 1 min, so it’s certainly worth the time to make it.
Something I chose to do along the very bottom of the fence is to make the very last picket a treated board instead of cedar. So when placing the top layer of pickets, you can only work down so far or you’ll cover up where the treated board needs to be placed. So after getting all the top layer pickets attached, we next went back to the bottom of each bay and first added on the treated board, then attached what will be the very last top layer picket.
Oh, and just a note here…we used a 12’ treated board here which spans two bays instead of a single. Only reason for this is because 6 foot treated boards don’t exist and an 8’ board would create a bunch of waste. The boards that will be the most susceptible to rot are the ones in either direct contact to the ground or closest contact. So by using a treated board at the very bottom, I’m hoping that will extend it’s lifespan.
Man, that was a ton of work. We are getting close to finishing up so hang tight.
Next up is trim, which this style has very little of. It’s really just these seams where the pickets butt up to one another. A vertical 1x board is attached to each one which not only covers up the but joint but also the dog ear of each picket. It’s a simple but drastic change.
The bottom can be lined up with the post, which you can see I do by peaking at the bottom of the fence. After shooting in one nail, Jake plumbed it up at the top then it could be attached all the way up before moving the whole operation over to the next seam and repeating.
Now on my last fence I actually purchased pre stained pickets and I liked this because the entire board was coated and it also saved time when installing. However, I wasn’t able to find prestained pickets this go around so instead I got out the airless sprayer and applied three coats of an oil based Simi translucent cedar colored stain to each side of the fence.
I do recommend coating both sides of the fence if possible. Even though Western Red Cedar is naturally rot resistant, all these additional things….like adding a stain or keeping it from contacting the ground, is only going to add more time to it.
Don’t get me wrong, a fence is a big project because of it’s scale, but if you break it down into steps, everything is actually quite easy. I would recommend not doing it in the middle of summer to make it even easier. However, whenever you do it, if a fence is on your to do list then there is a lot of money to be saved by tackling it yourself. Plus, it’s a wonderful feeling after it’s completely to have people ask “who built your fence?” And you get to answer “I did”.