from Home Improvement – Today's Homeowner https://ift.tt/2ACAZmQ


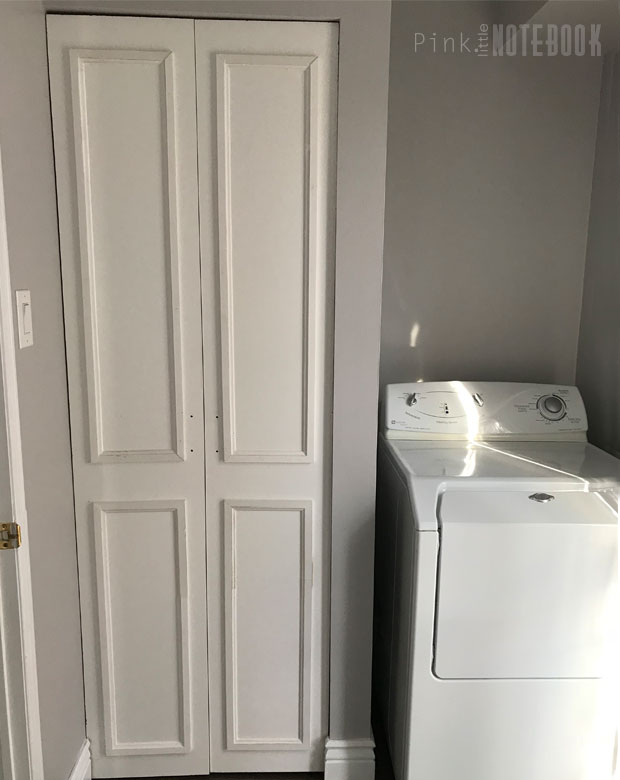
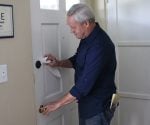
Doors play a more important role in decor than you might think. Just as updating your front entry door can make a substantial impact on your home’s curb appeal, updating your interior doors can make you feel like you’ve done a remodel.
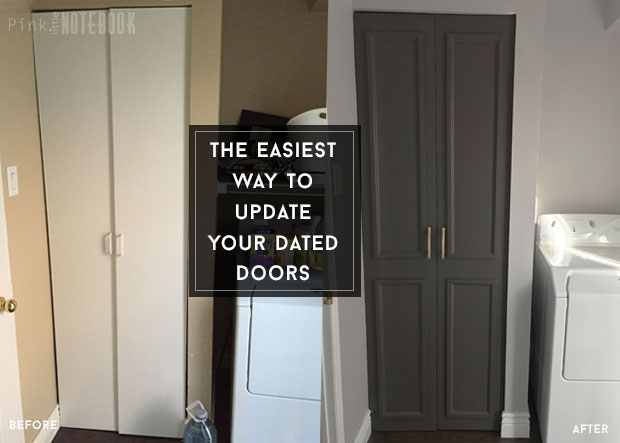
To get the look of costly paneled doors (without the expense), a little moulding, paint and new hardware can go a long way.
Add style and detail to any of your doors with this quick and easy DIY project.
Moulding/Trim
Primer
Melamine+Cabinet Paint
Paint Brush/Roller
Nail Gun
Wood Putty
Hand Sander
Door Hardware
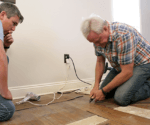
1. You want to choose a molding that accents but doesn’t overwhelm your interior doors. Measure and calculate the size of the frames that you need to make.
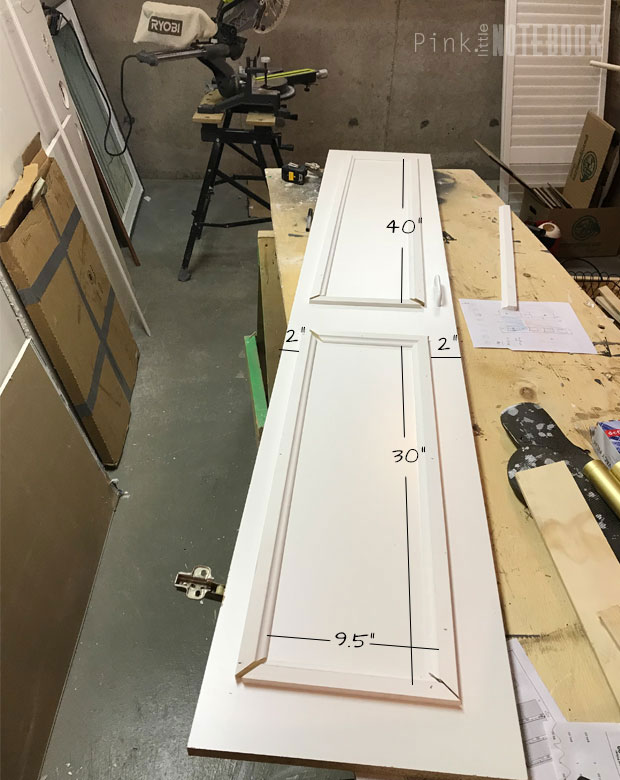
2. Cut your moulding pieces down to size for each door with a mitre saw and lay out your trim on the doors. Before you secure it in place, measure for even placement.
*TIP* Use a nail gun to secure the moulding instead of wood glue. You eliminate any wait time.
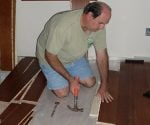
3. Fill in the nail holes and any cracks in the corner with wood putty. Sand it all down once it dries.
4. There is no easier or more impactful way to update your doors than painting them. To begin, use a primer to prep—a good primer is key to a great paint job. I used Para Paints Colour Boost Primer.
*TIP* To paint both sides of the doors simultaneously, it’s better to have the doors on the hinges vs laying flat. It cuts dry time in half.
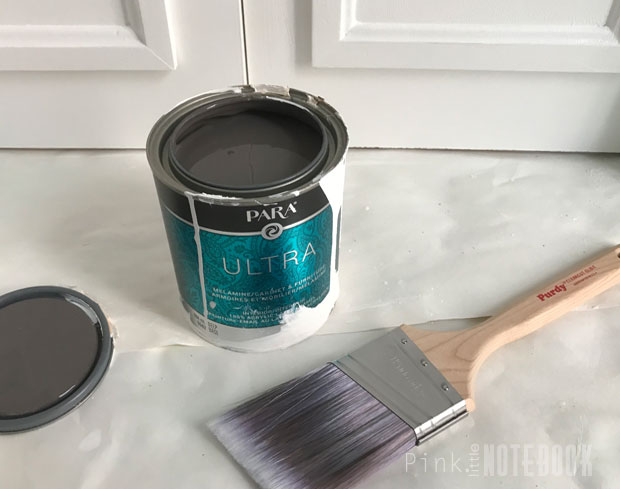
5. To get the ultimate surface protection and durability, it’s important to use paint specifically made for your surface. My go-to paint for furniture and doors is Para Paints Melamine, Cabinet and Furniture Paint (shown here in the colour Brushed Nickel, P5244-62). I apply my last two thin layers of paint with a high-density paint roller.
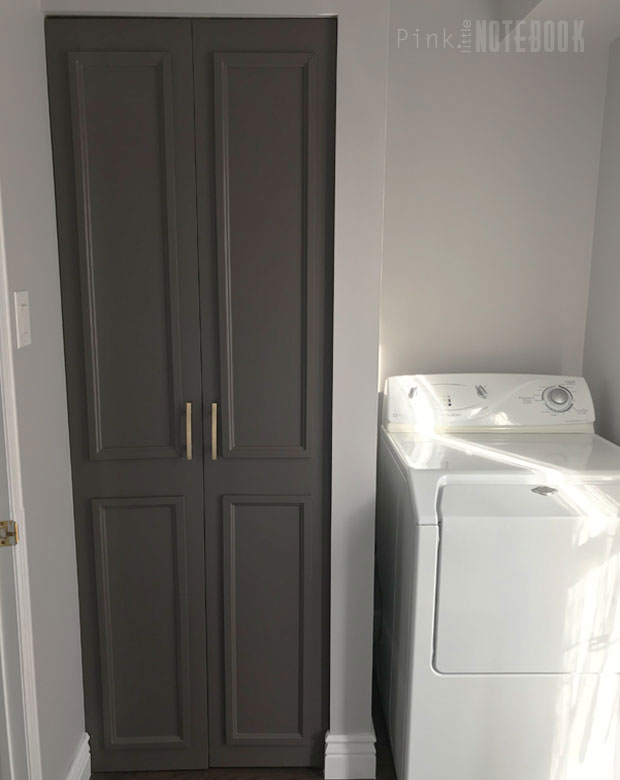
Paint alone always makes the biggest difference but add a little moulding and new hardware and you got yourself a brand new door. It’s such a quick and easy way to dress up those old doors.

Disclosure: This post was brought to you by My Colour Journey With Para Paints. As always, all thoughts and opinions are my own. #mycolourjourneywithPARApaints
The post The Easiest Way to Update a Flat Panel Door appeared first on Pink Little Notebook.
Toting around my shop vac and my separator anytime I want to use dust collection with my power tools is such a pain, so this week I built this cart to simplify things for me.
Things I Used in This Project:
RIDGID Round Shop Vac
RIDGID Square Shop Vac:
Dust Right Separator
ISOtunes Bluetooth Hearing Protection
Universal Small Port Hose Kit
Sketch Up
Hercules Dolly
Ultimiate Workbench Plans
Triton Track Saw
Cord Reels
Right Angle Clamp It Jigs
Titebond Original Wood Glue
Woodpeckers 12″ Square
Rockler Surefoot Clamps
Infinity Table Saw Blade
Infinity Insert Plate
4″ Belt Sander
3″ Belt Sander
Palm Belt Sander
Large ROS
Palm ROS
Sand Paper Cutter
If you’re new to this hobby then a quick overview for you is: breathing in dust is bad. One way to control it is to hook a shop vac directly to your tool when you’re using it. This sends all the dust through the filter of the shop vac and the shop vac collects it.
A great add on to this set up is a cyclone or a separator. I have the Dust Right Separator where I hook up a hose to my tool that feeds into the separator, then the separator feeds into the shop vac. This separator collects the majority of the saw dust that I create, leaving only the finer saw dust to go through the filter of the vac and be collected.
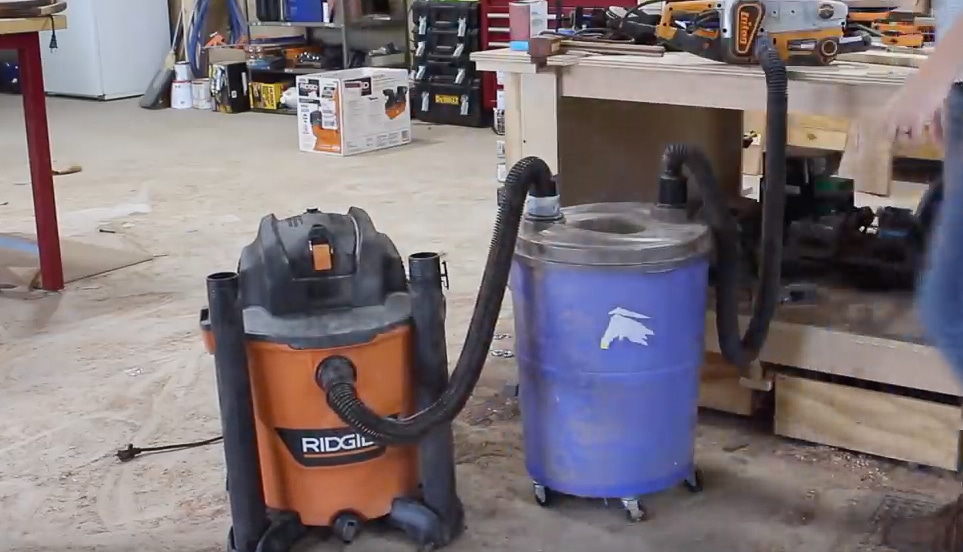

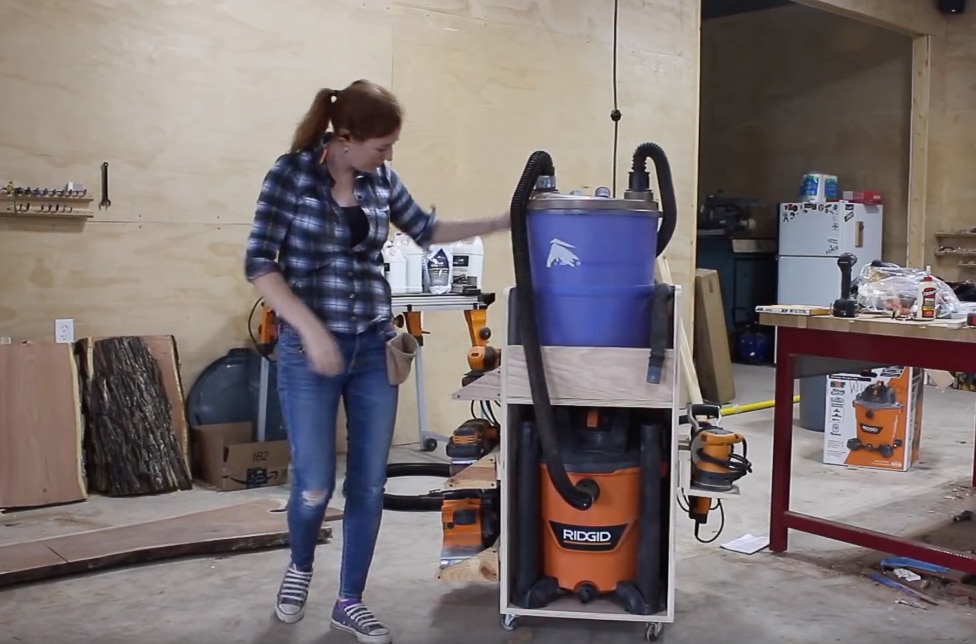
This is my preferred set up. However, getting back to the irritation, it’s a pain to haul both of these individual units around the shop to where I’m working. So this week I designed a storage solution to simplify it.
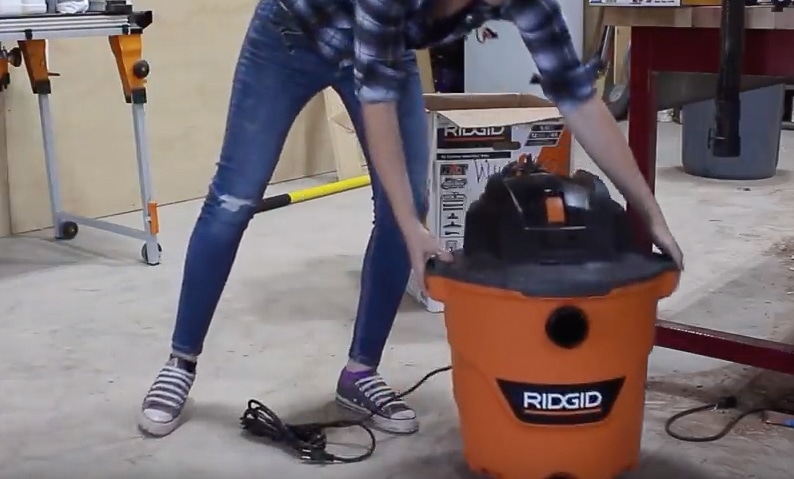
I decided to go ahead and upgrade my shop vac while I was building something. I’ll be using a RIDGID 12 gallon 5hp wet/dry vac. It’s pretty much the same height as my separator.
I played around with designs and decided to make a taller cart than I originally planned, with a smaller footprint. This is an option with the units stacked, with the hose going straight out from the vac up to the separator. I still had room for the sanders on the left and the ROS’s on the right, but then broke up the sandpaper storage to go on both sides in order to make it all fit.

Having these design changes and options is exactly why I love taking the time to model my projects before starting. Ok now that you see what I’m going after, lets build it.
I’m building it from one sheet of 3/4” plywood so I started by wheeling a sheet over to my workbench and breaking it down with my track saw.

Once I had things at a more manageable size, I took those sheets over to the table saw and broke them down to their final size. And just a tip for you: whenever I’m working off a cultist, after I cut a piece to size I label the edge so I won’t get it mixed up with the other parts of the build.
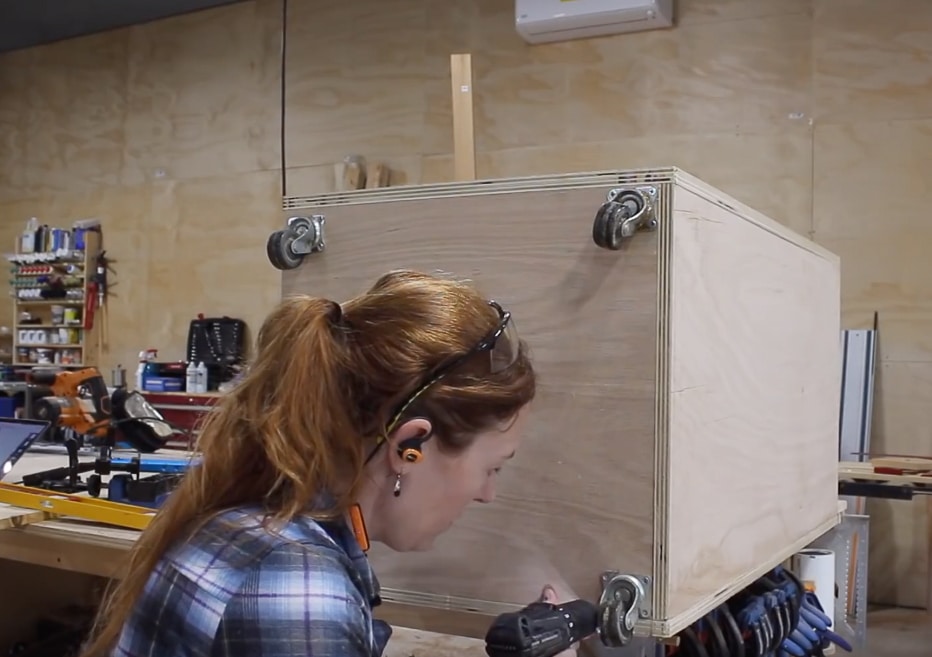
To start joining things together I grabbed the back and one of the sides then used the aid of these right angle clamp it jigs to hold both together at a 90. This makes it easy to go through and predrill then attach with screws. After getting one side attached, I repeated the process for the other side.

Next I flipped it on it’s back and attached the bottom. Oh and I’m using Titebond original for this project. Next I attached the shelf in the same manner. I first measured on where it needed to go then made marks on the front and back on both the side pieces. Before securing it with screws, I also use a square just to make sure everything looked good. Once I had the two front corners pinned, I used the square to draw a line down center so I could pre drill and screw the back of the shelf into place. After repeating on the other side, I quickly attached four casters to the bottom to make this unit mobile, then set it on the ground to test out.


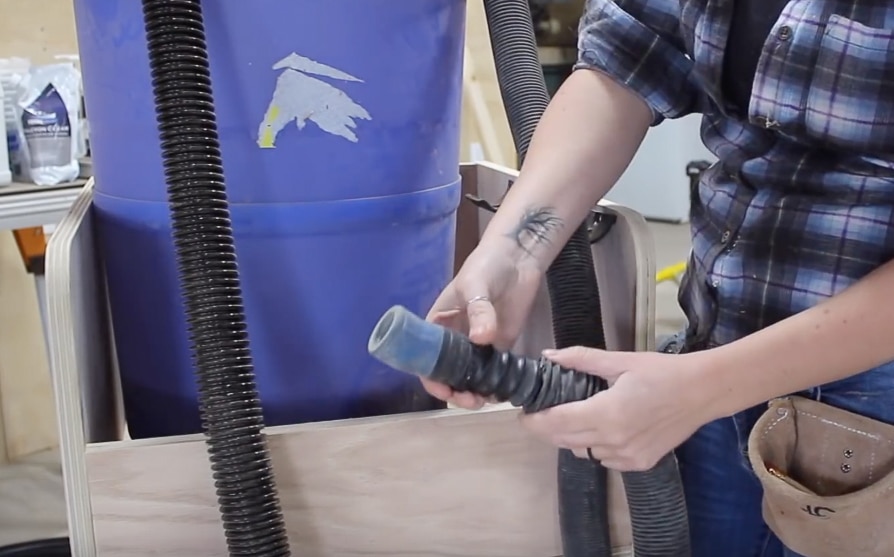
Separator goes on top, shop vac on bottom. The hose as well as all the attachments have a quick connect feature which will make not only connecting the hose but also disconnecting it to clean out the vac, quick and easy.

I thought I would have to build in some holders to store the vac attachments but RIDGID actually incorporated a storage method in the feet! So that’s handy and saves me a step.

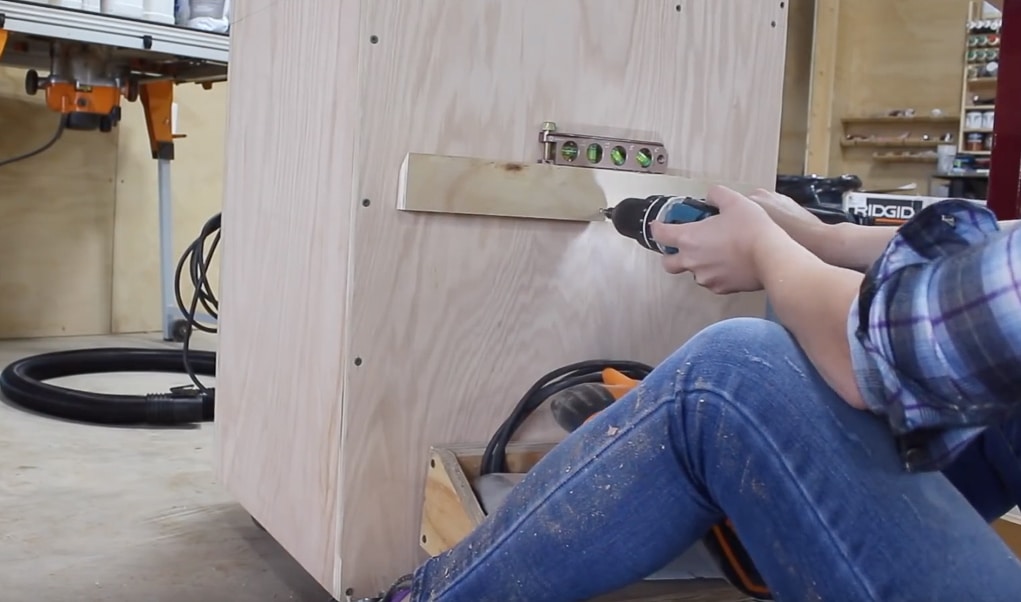
Now the reason the separator is on the top is because it’s the portion that is connected to my power tool and I wanted it to have the ability for it to pivot around along with me instead of being confined inside the lower cubby. That’s also the reason I left it on casters. To keep it from falling off the shelf however, I placed a front lip in between the two sides. And you can see that if this end is connected to my tool, I can go pretty much anywhere and the separator will rotate around with me instead of me having to rotate the cart.
The shop vac comes with these handy hose holders with the intention of giving you an onboard place to store it away when you aren’t using it. However, since it isn’t needed on the vac in my case, I repurposed them to hold my smaller hose from the separator instead of just tossing it inside the top compartment. This will keep the hose conveniently placed for easy grab and use.

I’m not incorporating any extra hose storage on my unit because I use this Rockler small port hose kit….which is a flex hose that is a stock diameter but comes with thread-on connections that are interchangeable. So instead of swapping out the entire hose to fit different ports on my tools, I just switch out the thread ons.
Ok let me pause and explain my thinking for this next part: I most often pull out the shop vac and separator when I’m running one of my five sanders and in most projects I never just use one. Instead of making lots of trips to grab my sanders from my French cleat tool wall, then having to put them back, I decided to place all my sanders on this cart. So that’s what I did next. Since I already built holders for these tools it was as simple as grabbing them off my wall and placing a cleat on the side of the cart.

My buddy Jay Bates built a similar cart for a vac and separator a few years ago but he went with a much lower profile body. So if you aren’t interested in all the side storage then I recommend checking out his plan here.
Since I’m storing my sanders, I also wanted to keep some sort of sandpaper storage here. I grabbed a piece of 3/4″ plywood that was wide enough to make up both of my sides. I then changed out my dado stack for a 1/4″ stack and cut a bunch of grooves. After getting those cut, I changed back my blade to a single black and cut this board in two down the middle in order to create the two sides needed.
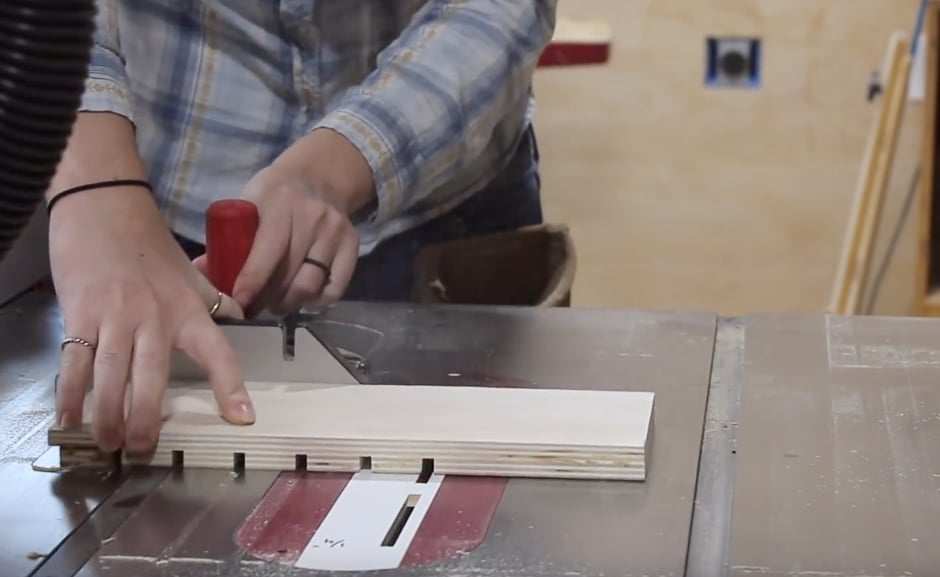
With the body done, I grabbed some 1/4″ scrap material, cut it to size and then glued them in place to make the shelves. After the glue dried, I did some sanding and then hung the sandpaper storage up. Instead of a French cleat on this one, I opted for pocket holes to keep the profile slim.


I was about ready to call this project done when I stumbled across a sandpaper cutter made by Rockler that I thought was so cool. So I put it up on my cart as well, next to my flat sandpaper. Now whenever I have a sheet of flat paper that needs to be torn to size for my sanding blocks, all I have to do is stick it into the holder, line up the side of the paper to the depth gauge, and then just rip it.

The last thing I included was a power strip. I originally wasn’t going to, I was just going to drill a hole in the back of the unit for the plug of the shop vac to pass through. However, I liked the idea of plugging the power strip into my cord reel, then being able to plug any of my sanders into the power strip instead of also having to run them to my cord reel. So main power comes in here, then I have plenty of outlets to run the tools that are being used with the shop vac cart.


This cart definitely simplifies moving both of these units around.
That’s it for this one. I hope this project helps you out. See you on the next build.

Find me on Patreon: https://ift.tt/2njTR2y
Follow me on Instagram: https://ift.tt/1QZ44xP
The post Dust Collection Cart – Shop Vac and Separator Storage appeared first on Wilker Do's.


In my shop this week it was all about doing a little bit more organizing. I’m sure you know it’s easy to set a pile on the floor and let it continue to live there. So I find that by forcing myself to look at it and think “what do I want to do with this”…little bit by little bit I’m slowing breaking in my shop and making things easier to find.
Things I Used in This Project:
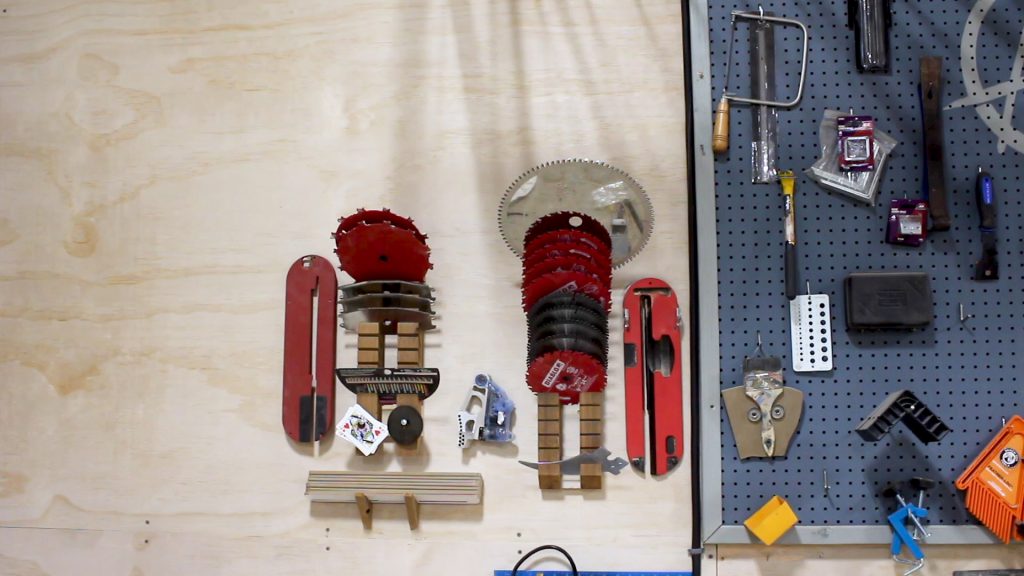
Let’s start off with a storage solution for extra saw blades and all those accessories. Between my track saw, circular saw, miter saw, table saw… and then I also have my dado stack, insert plates and all of the interchangeable inserts. I’ve had a big pile sitting on the floor next to my table for a while.

As I often do with shop project, I looked through my scrap wood and found chuck of cedar that will work well for this project. I started off by marking down one edge every 1”. Then I set my table saw to 45 degrees and made the cuts line up to my marks.


After working down the entire length of board I set my saw back to 90 and ripped it right down the middle.
 I placed a French cleat on the back as well as on the wall then started loading it down with my blades. Starting off with my larger diameter blades at the top. I made an identical one for my dado stack.


For my insert plates I cut two triangles at the bandsaw, drilled a pocket hole into each, then attached them to the wall to create a shelf I could set the inserts on.
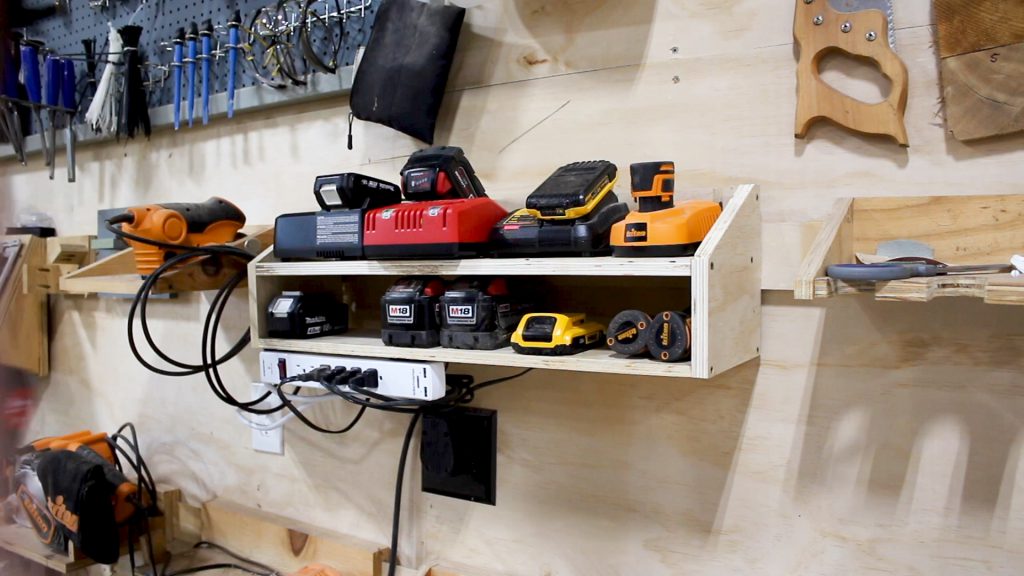
Next I started working on a battery charing station. I have one charger from each manufacture so I wanted a simple shelf that could keep them all together and organized for me. I again reached for some scrap, this time going with 3/4” plywood. I measured the chargers I have to store then cut a bottom and a back to create a shelf.

Before joining things together I laid the chargers out on the shelf and marked off where the power cords of each, fell on the shelf. Then I cut this location out over at the bandsaw. This will give me a place to route the cords later on.

I stuck things together with Titebond Original wood glue, using my Super Jaws to help hold things down, while I pre drilled and used screws to attach the two pieces.

Next I cut some wings that will not only give the shelf some support but also act as the sides of the lower shelf that will hold the extra batteries. To make getting the shape of this side wing easy, just set your shelf on end and trace the profile. I made my lower shelf 4” but measure your tallest battery and see if you need yours to be taller. After getting it cut at the bandsaw, I once again used glue and screws to attach things.

Now I just measured in between the two side wings and cut a shelf to fit between. I added in a few French cleats on the back then set it in place and loaded it down with power tool batteries and their chargers.

I did add a power strip, and this is so I can plug all my chargers into the strip then plug the strip into the wall.

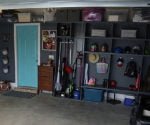
Alright then the last thing I decided to do was installed some ceiling mounted, steel storage racks made by a company called SafeRacks.
 I have installed this racks in my garage before so I already knew how quick they were to install and just how handy they are at getting those larger items that I need to store, off the floor and away from the valuable lower wall space, and up higher where they are still assessable when I need them.
I started off by placing the ceiling brackets into the joists.

After getting these attached I went back down to my workbench and started assembling the vertical arms. This is where you can adjust the height of the entire unit. To determine the height of mine off of the ceiling, I measured the totes I would be storing and decided that 3’ would be plenty.

After getting all four set to the same length, I hopped back up on my scaffolding, very quickly attached them, and then started putting in the cross members that make up the body of the shelf.

These SafeRacks do come in a variety of different sizes but I went with the 4’ x 8’ model, and airing on the side of cation once again of leaving myself extra room for extra inventory, I installed two of them. I’m not sure what the weight capacity is for the smaller racks but these 4×8’s are rated at 600 lbs. So that’s quite a bit of stuff these can hold!


I actually built another storage solution for the shop and that is this finishing rack which holds all my paint/stain/tube of caulking/and glue bottles. This was a few weeks ago when Triton Tools and Matt Cremona came to visit and Triton actually captured the project and produced a full video with a lot of fun behind the scenes included. Click here to check that out.


Be sure and watch my full video at the top for a more detailed tutorial of these projects. I hope yall enjoyed this one and I hope ya’ll go out there and clean those shops! See you on the next build.
The post 4 Shop Organizing Projects appeared first on Wilker Do's.


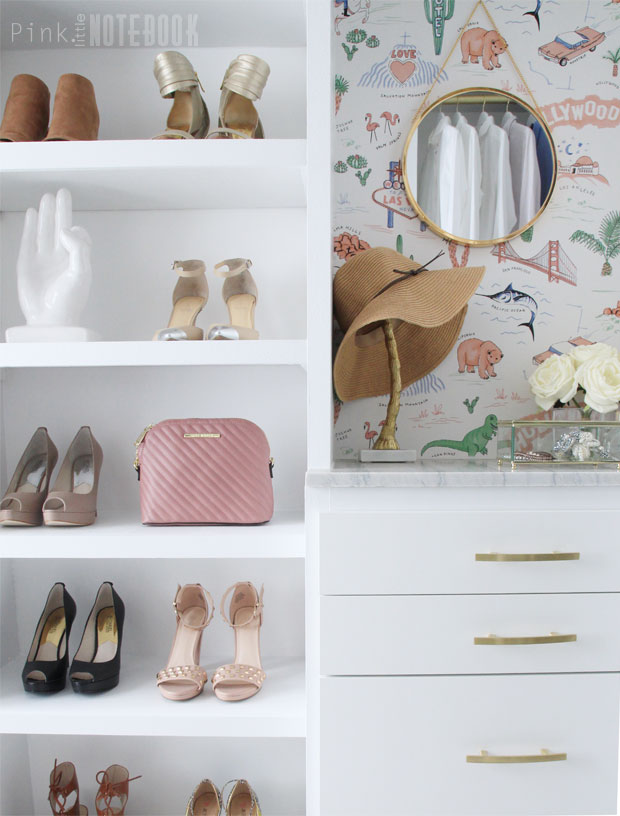
When I revamped my walk-in closet recently, I knew I needed a wardrobe specifically to help organize some of my smaller accessories. Since I couldn’t fit a dreamy closet island in my space, I had to come up with a small scale solution that would work for my closet. Something practical but cute.
In the end, I dedicated one wall to accessories. Our built-in unit included a floor-to-ceiling shoe shelf and a small vanity area complete with jewellery drawers and a quartz countertop.
As you may know, I had many challenges when it came to building this closet—space depth being one of them.
For this project, I had a max depth of 15″ to work with and the IKEA shallow base kitchen drawers (24″ x 14 3/4″) worked perfectly. However, the rare size made it next to impossible to find a jewellery drawer organizer. Most inserts are made to fit the typical drawer depth of 24″.
Determined to stick to my vision, I decided to create my very own jewellery drawer insert. Here’s how I did it.
Wood (I used sanded 1/2″ plywood)
Stain/Paint
Cardboard
Velvet
Spray Adhesive
Glue Gun
Nail Gun
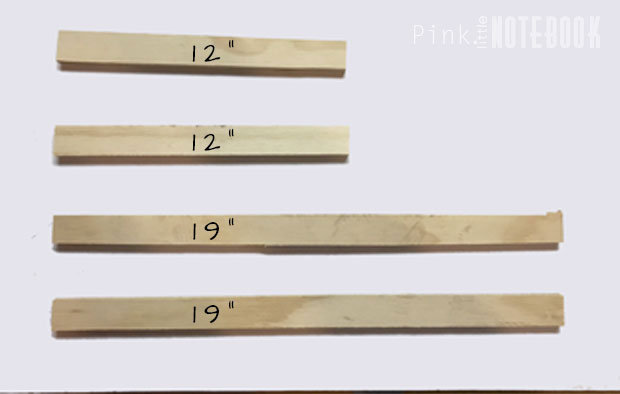
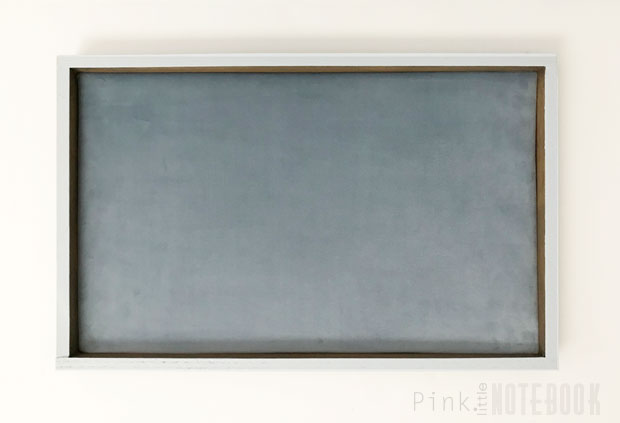
Since I had a bunch of scrape pieces of wood leftover from our closet built-ins, this is what I used to create the frame of the drawer insert. Although the IKEA drawer size is 24″ x 14 3/4″, the actual interior of the drawer is 19″x 12″. So I cut the wood pieces to size, with a height of 1 1/4″. I secure the frame using a nail gun.
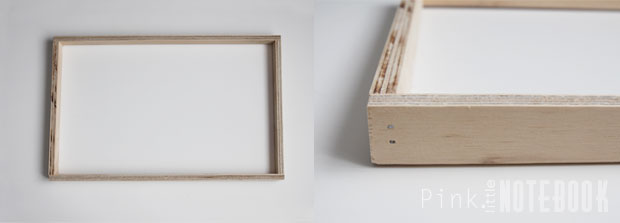
After a good sanding, I stain both the interior and exterior sides of the frame. Since cut plywood doesn’t absorb stain easily, I use a roller to paint the top edge in a light blue. This covers and hides the exposed edge.
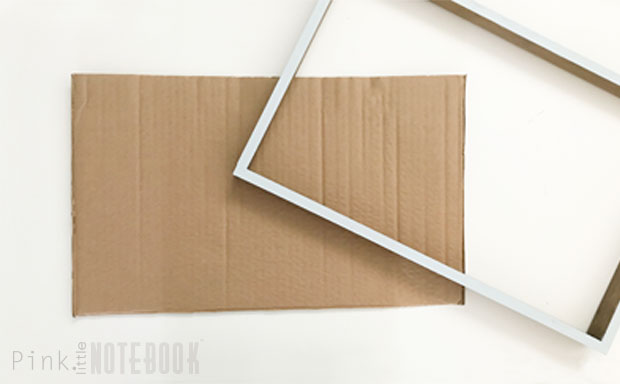
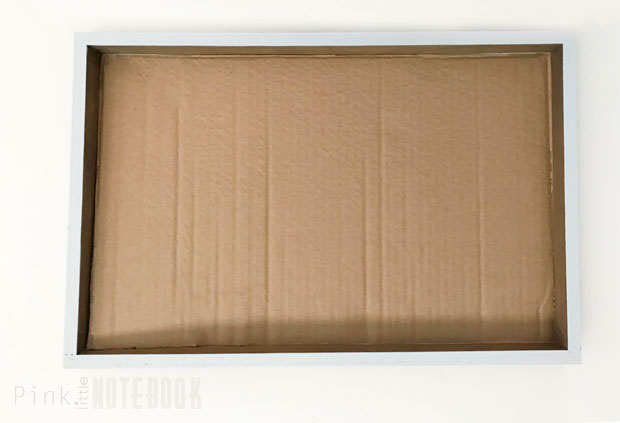
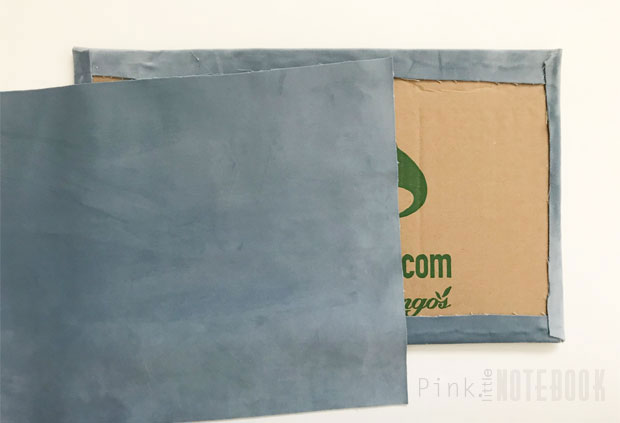
Next I grabbed a cardboard box and cut out the base of the drawer insert (18 1/2″ x 11 1/2″). Before you move to the next step, test it out. Make sure it fits snug.
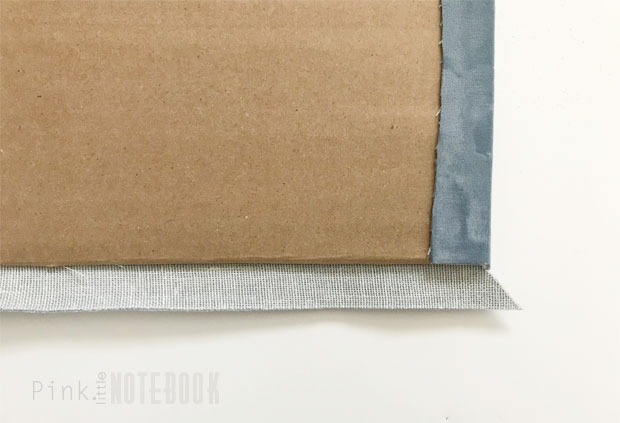
It’s important to line your jewellery drawer with velvet. This prevents it from shifting around when you open and close your drawer. Make sure you iron out all the wrinkles in the fabric before you begin.
To avoid seeing cardboard ridges through the velvet, make sure you line the cardboard first. Use either a piece of batting or thick fabric and then finish with the velvet on top. This is the key to a soft smooth surface.

Spray adhesive works best to glue the fabric to the front of the cardboard. This allows for no glue lines on your finish product.
Then you flip it over, make sure you pull your fabric tight around the edges and fold the excess material like you’re wrapping a present. I used hot glue on the back for a secure hold.
I know no one will ever see it but I cut a piece of velvet to cover the backside. I like knowing the cardboard is completely covered 
Since the cardboard is cut for a snug fit, you can slip the finished cardboard base in the frame. It shouldn’t move but for added protection, I add a dap of hot glue to each corner from the underside.
To add dividers, I cut 1″ strips of cardboard in the appropriate lengths. You can add as many or as little dividers as you want.

Using the spray adhesive and glue gun, I wrap each cardboard piece with fabric and cut it out.
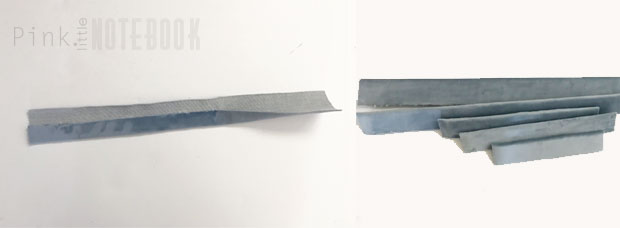
To attach the dividers to the wood frame, I use a bit of hot glue on the ends.
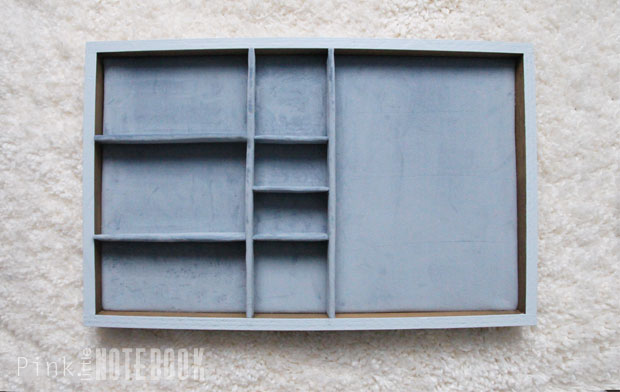
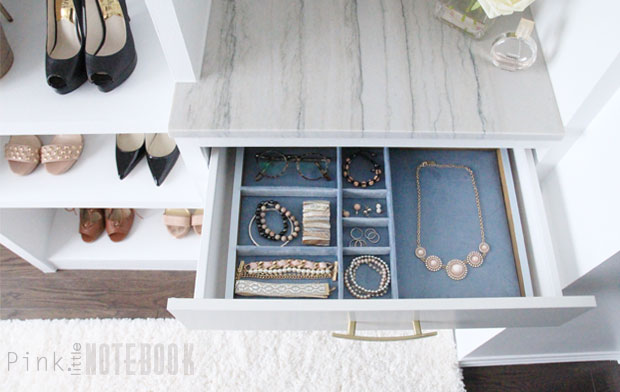
I loving having a jewellery drawer in my wardrobe! Nothing beats the feeling of being organized!

Click through these links to see more from our master closet series:
Designing my walk-in closet
5 Things to know before revamping your walk-in closet
Installing our built-in closet system (with pricing)
My DIY Master Walk-In Closet Reveal
The post DIY Jewellery Drawer Insert appeared first on Pink Little Notebook.

