Friday, August 31, 2018

Exterior Repairs - Home Improvement – Today's Homeowner

Exterior Repairs
Danny and Chelsea help Vinny and Linda Paragone repair siding, shutters and rotten fascia boards.

from Home Improvement – Today's Homeowner https://ift.tt/2N8LeaW

How to Fix a Clogged Kitchen Garbage Disposal - Home Improvement – Today's Homeowner

Using baking soda to clean a garbage disposal.
Find out how to easily repair and clean a clogged or jammed kitchen sink garbage disposal using a hex wrench, baking soda, and vinegar. Watch this video to find out more.

from Home Improvement – Today's Homeowner https://ift.tt/2N6VznC

Flood Fixes - Home Improvement – Today's Homeowner

Flood Fixes
Danny and Chelsea help a Houston, Texas couple with home improvements following Hurricane Harvey.

from Home Improvement – Today's Homeowner https://ift.tt/2MI319l

Monday, August 27, 2018

Installing a Mini Split AC/Heating System in the Shop

This was such a cool week in my shop, and I mean that very literally as I got AC installed. 

Temperatures in Texas get hot hot hot during the summer and with as much as I’m in the shop, an AC system is an absolute must. I went ahead and filmed the process of the installation even though I didn’t install the unit myself (I’ll cover why later on). So in this tutorial, I’ll cover why I went with the unit I did and give you an overview of the process so you can kinda know what to expect if you’re looking into doing the same. 

I partnered up with two companies for this project so I want to say a big thank you for Carrier Systems and Mini Split King for sponsoring this video.

The first step in the process was to figure out how big of a unit I would need for my space. The factors that play into this are the square footage of the space, how high the ceilings are, R-value of the R-value of my walls, ceiling, windows, and garage doors. When the AC guys ran the numbers they came back and told me I pretty much built a yeti cooler and I would only need a two ton unit to heat and cool the entire space. 

And if you recall the video when the spray foam was being added, I mentioned that even though it’s more expensive up front it is so effective that it saves on the heating/cooling step and this is a great example of that in play.

Before Mini Split King showed up, I pulled off the wall sheathing directly underneath where the unit was going to be mounted to the wall. Then ripped the very top sheet in half and remounted only the top half. This is so the unit can be mounted to the wall but the install guys will have access to the bottom of the unit.

Now Carrier has a large range of mini splits able to handle anything from a garage to a house to a shop the size of a house. ; ) I’m going with 2 one ton units that are, by far, the most efficient unit on the market with a SEER rating of 42. 

One huge advantage to going with a mini split is it’s a ductless unit, meaning instead of having to run traditional ducting in the attic to distribute the air, it only requires an outside unit called a condenser, then a hole in the wall to connect that to the inside unit called the air handler. 

I’ll have one placed on the back wall of each section of my shop so that I can either have both running to heat or cool the entire space, or once I install a bay door in between the two sides of my shop, I can have the option to only heat or cool the side of the shop I’m currently working on. The cooling will be amazing for Texas but it’s worth noting this unit can heat with temps down to -22 outside.

The unit comes with a mounting bracket on the back that can be removed then placed level on the wall. Since this is my woodshop, the guys mounted my unit up pretty high on the wall to keep it away from as much sawdust as possible, although it will still get dust pulled into the filter and need to be cleaned regularly. 

Then they punched a hole through my sheathing which will allow the plumbing of the unit to be fed into the wall and down to another hole that will lead to the outside unit. Although the air handler is about ____ x _____ you can see it is pretty light weight. 

With the unit securely in place, he next started routing the communication wire which will allow the inside unit to talk to the outside unit. 


***A few other features built into this unit is a dehumidification function: Unlike the dry function on regular mini splits this is the only system in the market with a true dehumidifier function built in that will not over cool the space trying to remove humidity. This is great for Wood shops. It has wifi so I can control the unit from my phone annnnd it has a sensor a sensor on the bottom right that you can set to follow you around the shop and direct the vents towards your location.

You can see with the door of the unit open, you can see the filters. With this being in a shop, it’s recommended that I clean the filters out once a week. Cleaning will mean slipping them out (which is simple enough), dunking them in some water, then letting them air dry. Another preventative measure I took since this is a shop is I attached a layer of roll out filter on top of the intake of the unit to catch a lot of the dust before it enters into the internal filters. 

Next up was to drill a hole in the bottom of the wall all the way to the outside unit. To keep the outside of the wall from tearing out, Joe started from the inside until the center bit of the holes punched through the outside sheathing. Then he moved to the outside and finished the cut. This hole will be where the interconnecting refrigerant, control and drain lines will be ran through to the condenser. 

Once ran these lines can be cut to their proper length and attached, then also tidied up so they fit snugly back into the wall channel. 

All in all the inside install took about an hour to an hour in a half. And before you ask, yes it is simple enough to install yourself however there are two key factors on why it’s still a good idea to hire the job out. One is if you buy a unit direct and install it yourself, you won’t get a warranty through the manufacture. If you go through a certified HVAC contractor your unit will have a ten year warranty attached to it, and often the installers will also have some sort of warranty. Mini Spilt Kings offer a two year service warranty when they do a job, so that’s a huge reason to hire the job out. The second reason, I’ll get into in just a second after I show the installation of the outside condenser. 

The condenser can be set on the ground on a concrete slab or mounted to the wall. Since I still have some grading to do, I chose to mount mine to the side of my shop, about waist height. 

A bracket is placed level on the side of the building where two arms are attached. Then the unit can be set into place and secured down. You can see it’s relatively light weight where one person can lift it. 

Next the lines coming out from the inside of the shop can be cut to length and attached to the condenser.

And now comes in point two on why hiring out the install is a good idea. Before adding refrigerate, the system got pressurized with nitrogen to check for leaks and then bled out so that they could connect a vacuum pump that draws out all the air and humidity from the lines.

If this step is skipped then the moisture that is in the lines will always remain in the unit and attach to different parts inside causing corrosion and premature wear and tear on the unit. Once the micron gauge gets to at least 500 microns then the refrigerant can be released throughout the unit, and that means it’s ready to be turned on. 

I then went inside the shop and closed the doors and lowered my garage doors. By the way, having these new Wayne Dalton garage doors closed is just as bright as having them open thanks to all the windows. I’m so thrilled with how much natural light they let in.

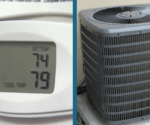
With the shop closed up I then powered both air handlers up to full blast! And goodness me, are these things quiet!

I turned them on turbo since this is the first time cooling the space, so this is the loudest it will ever be…..which is pretty dang quiet if you ask me. Check out the video above and see.

For finishing details, the guys added in a surge protector so that this $60 protector will need to be replaced instead of the entire unit. I also used some Titebond Weather Master Sealant to caulk around the hole put into the shop then last thing was to replace the inside panels of my shop wall. 

I just want to quickly point out, this is exactly why I went the long route of using screws over a nail gun to sheath the inside! It hasn’t even been a year and I’ve removed a few panels here or there to get inside the walls for some reason or another. So I recommend doing the same if you build or have something built. 

Ok and that about wraps it up. Having an heat and cooled space is going to be simply amazing. Again, big thank you to Carrier and Mini Split Kings for working with me and sponsoring this project. 

Here is a link to the units in case you’d like to check them out https://ift.tt/2LxqMLN

The post Installing a Mini Split AC/Heating System in the Shop appeared first on Wilker Do's.


from Wilker Do's https://ift.tt/2oeGbHV

Fine-Tune Your Woodworking Projects with Just One Tool - Home Improvement – Today's Homeowner

Fine-Tune Your Woodworking Projects with Just One Tool
This set combines all the tools you need to fine-tune wood.

from Home Improvement – Today's Homeowner https://ift.tt/2t58o6I

This Household Product Doubles as a Low-Cost, Non-Toxic Fertilizer - Home Improvement – Today's Homeowner

This Household Product Doubles as a Low-Cost, Non-Toxic Fertilizer
This household staple isn't just for sore muscles, small wounds and dry skin. Joe Truini explains how it can be a low-cost fertilizer.

from Home Improvement – Today's Homeowner https://ift.tt/2liOyRf

Sunday, August 26, 2018

5 Reasons Why Your Air Conditioner is Constantly Running - Home Improvement – Today's Homeowner

5 Reasons Why Your Air Conditioner is Constantly Running
If your air conditioner never shuts off, it may indicate one of these five problems.

from Home Improvement – Today's Homeowner https://ift.tt/2whakuy

5 Improvements That Could Increase Your Home’s Value - Home Improvement – Today's Homeowner

5 Improvements That Could Increase Your Home's Value
Even with a limited budget, you can make changes to increase your home's value.

from Home Improvement – Today's Homeowner https://ift.tt/2MUb0PZ

7 Home Renovations That Affect Your Insurance Premiums - Home Improvement – Today's Homeowner

7 Home Renovations That Affect Your Insurance Premiums
Before you make those renovation plans, consider how renovations will affect your homeowner's insurance premiums.

from Home Improvement – Today's Homeowner https://ift.tt/2BMW0PK

Saturday, August 25, 2018

ASK DANNY: Help — Our Bathroom Vent is Blowing Black Dust! - Home Improvement – Today's Homeowner

ASK DANNY: Help — Our Bathroom Vent is Blowing Black Dust!
Regular home maintenance requires cleaning out the bathroom and dryer vents, Danny says.

from Home Improvement – Today's Homeowner https://ift.tt/2BKcUyr

Today’s Homeowner Radio Show for Aug. 18, 2018 - Home Improvement – Today's Homeowner

Today’s Homeowner Radio Show for Aug. 18, 2018
Listen to the Today's Homeowner Radio Show for Aug. 18, 2018.

from Home Improvement – Today's Homeowner https://ift.tt/2PEZc2O

Friday, August 24, 2018

Installing Two Giant Property Gates

Things I Used In This Project:

In two previous videos I have shown how I built two different gates for my property. One to the house, and one to the shop. This tutorial/video shows how I got them both installed, which was a pretty big ordeal as they are both large and heavy.

The location of the gate is pushed off the road so that an entire truck and trailer can pull completely into the driveway, off the road, before hitting the gate.

Also, before punching the holes in the ground, I waited until I built the frame for the gates so I could get an exact measurement on how far apart these holes needed to be. They need to be pretty accurate because you only have a few inches of play in both directions. And since I live on solid rock, I had to hire a contractor with a rock auger bit to punch all eight holes.

The holes were about 30 inches deep and there are 4 posts at each gate location. Two for the main posts and two for the sub-posts that will support the main posts that the gate is hinged to. These sub-posts give the main posts much more rigidity.

I started by mixing up concrete and setting up the main posts that the gate will be hinged to, as well as the two sub-posts. All of these posts are left tall at this point and will be cut to their final size after the gate is installed. We made sure all of the posts stayed plumb while they were curing.

For the stringers, I used a smaller diameter pipe. To butt up flush to each other, the ends of these stringers need to be profiled. Cody found this awesome free software online where you can type in the angle and diameter of your pipe and it will spit out a printed template that you can cut out, wrap it around your pipe and trace it to cut. I used my Tomahawk 375 Plasma Cutter to make these cuts.

The main thing to pay attention to here is that you want the profiles to line up to one another. The center of the dip on one end is center with the dip on the other end. We then put the stringers in place to test the fit. And then took off a little bit here and there with a grinder until both sides rested snugly.

I then used a grinder to clean up the posts at the welding point to get a nice weld. And then welded them in place by hooking up a generator to my Lincoln Electric MP210 machine.

The angles of these stringers were chosen because the bottom of these posts is the most secure, being knee deep in concrete. However, the higher up you go, the easier it is to pull the post over. So, you want the stringer placement up high on the post to provide as much support as you can get.

I then put on two coats of primer and two coats of paint.

Moving on to the mounting the gates. We started off with the shop gate. I pulled a straight line down the middle on the hinge side of the gate. And another down the center of the hinges. It’s worth noting that these hinges are rated for 700 lbs. Which is well above what this gate weighs.

We first set a 4’ level on the gate to get it plumb. And then placed the hinge in its spot to get it plumb with a smaller level, using a magnet as a resting shelf.

After getting the hinge where I thought I liked it, I tacked it in place and then welded it shut.

Huge lesson: we found out that the barrel of the hinge wasn’t welded on straight from the manufacturer, which created a big problem of course. So the lesson is to plumb the barrel of the hinge and not the mounting plate. To fix this problem, I cut through the two welds holding the barrel on, just enough to move the barrel over and push it into plumb. I then welded it all into place.

We then used the 4’ level to span from the top hinges down to the bottom hinge to make sure they were on the exact same line. It’s really important to take your time on this step so that the hinges wont get bound up by being misaligned.

Ok, now time to get the gate down to the entrance to weld on the second part of the hinges. Cody wrapped a strap all the way around the gate and lifted it up with the tractor to move it, which worked beautifully. We moved slowly down the driveway so that Brian could keep the gate steady. And then they slowly crept up to the gate to set it in place.

We piled scrap wood on one side and a floor jack on the other to prop up the gate to the height we wanted the gate to be. We then put a level on the gate and then used the jack to raise or lower the gate into level. Once the gate was level, we then scooted the gate into the posts until both of the hinges were resting flat up against the posts.

Now using a magnet, I attached the second part of the hinge. We then used a level to make the gate completely plumb. I tacked the hinges in place. And then we again checked level and plumb before I welded them closed.

And the moment of truth: We were able to let off the tractor and the jack and open it up to see if it worked. And it looked great. We celebrated with a happy dance.

Now that the gate is installed, the second main post can be set. You want to wait until the gate is in so you have a little play over the amount of space between your second main post and the gate. I mixed up a little more concrete and set the second post, leaving about an inch gap. The post came out super nice and plumb, with a super nice and even gap.

Next up was installing the other gate leading to the house. We repeated almost all of the previous steps with just a few differences. One difference was in the stringers that attach the sub-poles to the main poles. This time, we welded them on horizontal instead of at such a steep angle like the ones for the first shop gate. I personally think it looks way cleaner keeping them horizontal.

We plan to add concrete to this driveway in the future, which will require an additional 4 inches of room underneath the gate. So to account for this, we mounted this gate higher (8 inches in the air) than the other gate.

After we got the gate welded on, we once again had that really cool moment where we were able to back off of everything and watch the gate open and close for the very first time. There’s something really cool about building something so huge and then seeing it function and operate.

To finish up I cut all of the posts to their final height. I cut the main posts to be about level with the gate itself.  I primed and painted all of the poles and did some touch up paint on the gate where needed. Since I had two bags of concrete left over, I went ahead and filled up both of the main posts that the gates are hinged to. Then to cap off the posts, I ordered some 3 1/2” post caps that are domed on the top that will just slip right over the posts.

The very last thing I did was cut out a small metal flap and welded it to the back of each gate so it will reach out and grab that main post and keep the gate from swinging past it.

I don’t know what it would cost to have these gates built. But I can tell you that we only spent about $1200.00 between both gates. We still need to buy the actuators. But I can still guarantee that is a lot of money saved since I built the gates myself.

The post Installing Two Giant Property Gates appeared first on Wilker Do's.


from Wilker Do's https://ift.tt/2oaCLpw

5 Organizing Tips to Make Your Home More Comfortable - Home Improvement – Today's Homeowner

5 Organizing Tips to Make Your Home More Comfortable
Want a comfortable home? Then learn this phrase: “A place for everything, and everything in its place.”

from Home Improvement – Today's Homeowner https://ift.tt/2Mz71cb

Thursday, August 23, 2018

This Surge Protector is Flexible and USB Compatible - Home Improvement – Today's Homeowner

This Surge Protector is Flexible and USB Compatible
Some devices' plugs are too bulky for a typical power strip. Globe's Flexigon can twist to prevent any one plug from overtaking an extra outlet.

from Home Improvement – Today's Homeowner https://ift.tt/2LKw3jY

Hole Saw Tip: How to Prevent Stuck Wood Plugs - Home Improvement – Today's Homeowner

Hole Saw Tip: How to Prevent Stuck Wood Plugs
Do wood plugs get stuck in your hole saw? Joe has a Simple Solution for that problem.

from Home Improvement – Today's Homeowner https://ift.tt/2l2SvZZ

August Lawn & Garden To-Do List - Home Improvement – Today's Homeowner

Flowers blooming
August is in the “dog days of summer,” the hottest and most sultry time of the year. Everything seems languid and still – except mosquitoes – and the sun threatens to bake lawns, gardens, and gardeners alike.

from Home Improvement – Today's Homeowner https://ift.tt/2uWDS0b

3 Signs of Foundation Damage — and 5 Prevention Tips - Home Improvement – Today's Homeowner

Drought conditions can cause big problems to your home's foundation. Here's what you can do before that happens.

from Home Improvement – Today's Homeowner https://ift.tt/2NchXsx

Wednesday, August 22, 2018

How to Build Gates for a Wood Deck - Home Improvement – Today's Homeowner

How to Build Gates for a Wood Deck
Deck gates help keep your kids safe during quality time with Mommy and Daddy.

from Home Improvement – Today's Homeowner https://ift.tt/2w84eMV

Install these Lights and Say Goodbye to Mosquitoes - Home Improvement – Today's Homeowner

Install these Lights and Say Goodbye to Mosquitoes
Watch this video to learn about NuTone's Haven outdoor lights that double as insect repellants.

from Home Improvement – Today's Homeowner https://ift.tt/2w6W0Vl

How to Install Stone Veneer Siding - Home Improvement – Today's Homeowner

How to Install Stone Veneer Siding
Stone veneer siding can enhance any home. Here's how to install it.

from Home Improvement – Today's Homeowner https://ift.tt/2whU3Vl

Tuesday, August 21, 2018

Protected: How to Build an Outdoor Kitchen with Concrete - Home Improvement – Today's Homeowner

There is no excerpt because this is a protected post.

from Home Improvement – Today's Homeowner https://ift.tt/2MDcKNz

Making Your Bathroom Beautiful and Functional - Home Improvement – Today's Homeowner

The bathroom is one of the most used rooms in your house — and sometimes it can be the ugliest. So what are some things you can do to make your bathroom beautiful? “Today’s Homeowner” TV and Radio host Danny Lipford has some tips.

from Home Improvement – Today's Homeowner https://ift.tt/2MEYoMy

Monday, August 20, 2018

The Top 25 Cities with Mosquito Problems - Home Improvement – Today's Homeowner

The Top 25 Cities with Mosquito Problems
Did your city make Terminix's list of cities with mosquito problems? Click to find out!

from Home Improvement – Today's Homeowner https://ift.tt/2MBPoHT

Sunday, August 19, 2018

‘Win Danny and His Crew’ 2018 - Home Improvement – Today's Homeowner

'Win Danny and His Crew' 2018
Danny and Chelsea make some bold improvements at Becky West's Santa Rosa, California, home.

from Home Improvement – Today's Homeowner https://ift.tt/2BoYYJM

Saturday, August 18, 2018

ASK DANNY: Wildfires Affected My AC — Now What? - Home Improvement – Today's Homeowner

ASK DANNY: Wildfires Affected My AC — Now What?
California's wildfires affected Barbara's air conditioner. Danny has some advice for cleaning it.

from Home Improvement – Today's Homeowner https://ift.tt/2w7LWdK

Painting Ceramic Tile Walls - Home Improvement – Today's Homeowner

Rolling paint on a ceramic tile wall.
If done properly you can paint over ceramic tile walls, but it might not provide the desired effect. Watch this video to find out more about painting over ceramic tile walls in a bathroom.

from Home Improvement – Today's Homeowner https://ift.tt/2nLgnD0

Friday, August 17, 2018

Building a 14′ Custom Metal/Wood Gate

As I explained in my last video, my property has two driveways, one that leads to the house and one that leads to my shop. The house gate I made was more traditional but this gate I wanted to design something one of a kind and something to do with woodworking. After some thinking on it, I came up with a metal frame gate, with a wooden slab center. The slab will have cracks cut into it and bow ties spanning them.

Tools and Materials

ISOtunes Bluetooth Hearing Protection
Ultimate Workbench Plans
Triton Biscuit Jointer
Titebond III Woodglue
Rockler Blue Clamps
Lincoln Power Mig 260
Welding Hood
Welding & Grinding Hood
Welding Jacket
Welding Gloves
Phillip Morley
Welder JD
Triton SuperJaws
Cordless Grinder
Corded Grinder
Triton Track Saw
3D Modeling Software
Power Carver
Metal Marking Pencil
Triton Router
Infinity Straight Bit
Rust-Oleum Primer
Rust-Oleum Brown Spray Paint
Lincoln Plasma Cutter
Triton 4″ Belt Sander

If you aren’t familiar with woodworking, a bow tie is something used to span over a crack in a slab of wood to hold the crack together and stabilize it. It’s something decorative but also functional.

The end result might look heavy, but it’s isn’t too bad. To keep the weight down, I went with cedar for the center slab. The gate needs to be 14’ across so I started off with 16’ foot boards and I began by laying the boards out on my shop floor to arrange the grain pattern.

Using the Biscuit Joiner

I wanted the gate to end up around 5’ tall so I bought 8 1x7s and started gluing them together one board at a time. This process took four days total as I could only glue up about two boards a day. I used my triton biscuit jointer to cut in a slot every foot or so. Then I used Titebond III wood glue as it’s waterproof and this will be exposed to the elements.

Once I got the slab clamped up to start drying, I hopped over to the metal side of my shop and began working on the frame

I built this frame the same as my previous gate, with thicker material on the bottom and the hinge side, then lighter material on the top and unhinge side. I started by cutting my square tubing to length at the chop saw, making sure I leveled each joint by shoring it up with scrap wood, before making the cut.

After getting the frame pieces cut, I cut a V notch into a scrap piece of wood then used this to hold the joints off the ground so I could bevel the ends to ready them to weld.

Welding the Frame

I would get the pieces nice and square, then also make sure they were flat to one another then tack them in place to start, make sure things didn’t move, then complete the weld.

A few things about having a giant wooden slab center. The wood will need room to expand and contract. I consulted a master craftsmen friend of mine, Phillip Morley, and he recommended incorporating a U channel that will hold the slab and have empty space at the top that will give the wood room to move. I had trouble finding the size of U channel that I needed, so a welder friend of mine, JD, told me to make my own from flat bar.

Perfect idea. So that’s what I did.

Making Custom U-Channel

I tipped the L frame up and used magnets to hold it flush to one side, which will ultimately be the front. The plan is to make a channel to hold the slab by welding on a piece of flat bar to the front and then the back of the frame all the way around.

After getting the front bar in place, I set a 1x piece of wood in place to represent the center slab then set in the back flat bar. This back bar isn’t as easy as the front because it isn’t flush to the tubing like the other. To make holding this in place easier and consistent all he way down, I used another scrap piece of wood as a spacer in between the magnet and the flat bar.

While this held the 1x tightly enough, it also left it just a little bit of wiggle room. This process was really slow as this long length of flat bar wasn’t perfectly flat, so I worked in small sections, moving that scrap board down, then tacking behind it, moving it down, then repeating.

After getting the bottom wrapped up, I repeated the process no the upright of the L frame. Starting with the front since it’s easiest, then moving the wood spacer in place to start on the back.

All the while, I would jump back over to the woodworking side of my shop when the previous board was dry, in order to glue up another board to the slab. I very quickly ran out of long enough clamps so I resorted to using good ole ratchet straps instead. These don’t provide the best clamp support, but as this slab is all visual and not structural, I wasn’t too concerned about getting a perfect joint.

I eventually outgrew all my clamps and had to rely solely on ratchet straps for clamping. Then I also eventually outgrew my workbench and had to move the slab to my shop floor to continue expanding on it. One bad thing about using ratchet straps for clamping is they want to curl up the material when tightening down. To keep the board straight, I would use a scrap piece of wood

Lots of scraps being utilized during this build

Running these perpendicular to the glue up and under the strap. This way as I tightened down on the strap, this board would be drawn into the slab and keep it from bowing.

Running the Belt Sander

Finally, the glue up was complete, so it got moved to the metal side of my shop so I could start cleaning it up and cutting in some cracks. It was pretty difficult working with such a large piece. I used two sets of saw horses that I staggered to try and provide support to the entire slab. I started off with my 4” belt sander and went over the entire thing. I wasn’t going to perfect flat or smooth here. I’m fine with it looking a little rustic but I did remove the glue squeeze out and the majority of the fuzz that comes with cedar off the shelf.

Next I measured my frame….about three times….to see exactly how long I needed the slab to be, then I used my track saw to cut it to length.

Ah, ok moving on to the cracks! I sketched out the idea for the gate in a modeling software before getting started, so I already knew what I wanted the cracks and bow tie arrangement to look like. To replicate it as close as I could, I used a tape measure to mark a few key measurements, then connected the marks by free handing it. This process is simple, but it still took me most of the morning as I would draw something, look at it, then change it slightly and look at it again just to change something else.

Power Carving the Design

However, once I finally had three cracks drawn on that I was happy with, I started cutting. I started off by using my power carver. I was hoping the cutting tool would be able to cut all the way through the 1x material, but the diameter is just a tad too small. So I used this tool to make the initial cut from the top, then came back with a jigsaw afterwards to complete them.

Up next was the making the bow ties. I’m making these from some 18 gauge sheet metal and will paint them the same color as the frame. I started off by laying out the pattern. Again since I first modeled the design to scale in my software I already knew how big I needed each bow tie to be. I’ll need five total with the biggest coming in at 24” and the smallest at 16.

To cut these out I’m using my Tomahawk 375 plasma cutter which has an on board air compressor. I freehand a lot of stuff I cut out with the plasma cutter, but since I want these lines to be as spot on as possible, I set up a torch guide using a scrap piece of tubing and two magnets. I positioned this bar 1/2” off my cut line so that I can rest my cutting torch against it and cut perfect along my line. The set up is very quick and easy to move around so it took no time to get these bow ties cut out. Man! Doesn’t that look cool!

I love the giant one, but heck, even the small steel bow tie is awesome in my opinion.

The cutting leaves a build up of whats called dross on the back and since I’ll want these to lay flush into my slab I stuck each bow tie in my super jaws then used a grinder to knock off all the back dross. I found a 40 grit flap disc is the best tool for this step.

Grinding off Dross

And now is a step I probably spent way too much time on, considering there isn’t huge amount that can be changed…..but next was to position the bow ties on the slab of cedar, across their cracks. There is no right or wrong here, but I still took my time and made sure I liked the placement of all five before tracing them on to the slab.

I wanted to inset the bow ties so they would be flush to the slab instead of resting on top. So after tracing them onto the slab, I stuck a straight bit in my router and started carving away the internals of the trace. I would start by going along the perimeter and getting the outline done, then worked my way inside. I learned on the first one to work backwards though because by starting on the outside and carving away towards the middle….I eventually loose material to keep my router base flat and the cut consistent. So instead, I would cut the outline then start on the inside and work towards the perimeter.

I bet you can imagine that this was a pretty time consuming process, but I was enjoying myself as it was beyond exciting see these bow ties click into place one at a time. I did mess up on two of the cuts, but I don’t believe I got any footage of it. On two I completed the outline cut then when I was working on hogging out the center material, I lost track of my outline and ran outside of it. I was kicking myself, especially doing it twice, but it is easy to lose track of that outside line after a few mins of cutting. So I recommend stopping and cleaning out the cut every few minutes to keep a clean eye of sight. I ended up fixing my mistakes with sanding them and easing their edges some. In the end, you can’t see them unless you are specifically looking for them.

After getting all the bow ties cut, I removed them from the slab and took them outside for a coat of paint. I started off with two coats of primer first. While that was drying, I moved inside to give the slab a coat of protection. I’m using a Semi-transparent stain in the color of cedar. This will keep the slab from graying-out over time.

Priming and Painting the Frame

By the time I was done with the slab, which I coated on the front and the back, the primer was dry on the bow ties, so I gave them two coats of paint. For this gate, I’m going with a Hammered texture paint by Rust-Oleum. It’s designed for outside use and also for metal. While the can calls it a brown, I would almost call it a pewter color mixed with brown. Whatever it is, I think it’s a lovely color that goes very well with the cedar color.

While I was in the painting step, I wanted to get the frame outside to also get doused. But first a few details needed to be sorted. First I drilled some weep holes in what will be the bottom of the frame, so that when it rains, water has a route to escape. Then I also cut some flat bar material and welded the ends of the open tubing close.

Now the frame could be moved outside and jiffy-rigged to stand up while being painted. You can see I used a set of super jaws on one end, then a ladder rung for the other. Same as the bow ties, I gave the entire frame two coats of primer then two coats of paint. I’m painting it first because once I have the slab in the center, I will weld the frame closed and then it would be a nightmare to paint without getting it all over the slab.

Once everything was dry, it was time to set the slab into the bottom frame. This was nerve wracking as the slab at this point isn’t that secure feeling, because of the giant cracks. So I first used a scrap board to scab over the largest crack and provide some support. Then, with help, I inset the slab into the U-channel of the bottom “L” of the frame.

Inserting the Slab

Next was to lift the top half of the frame into place, but before that, while I still had access I placed some nuts in the bottom channel, under the center slab, so when it does rain, the slab won’t be sitting in a pool of water.

Alright, next I grabbed Cody’s help to set the top frame into place.

I could now weld the frame close. Since I repainted the frame, I used a grinder to ground off any paint in the way of where I needed to weld. Then after laying down a bead, I used a grinder to knock it down smooth so it would look seamless.

To do any touch up paint, I ripped off some cardboard thin enough to fit between the slab and the frame.

Lets move to adding in those cool bow ties, shall we. I thought about gluing them in but instead decided to anchor them in from the back. I cut some 3/4” square tubing and first welded them into the frame where they would be covered up by the bow tie and not able to be seen from the front.

Going to the back, I drilled a hole through the back tubing, set the bowtie in place, then marked where on the bowtie lined up with this hole. This is so I could grind off the paint on the back so that I’ll have a clean work surface to weld the head of the carriage bolt to. You can see I marked with a sharpie where the head will land.

Now, before setting it back into place I slip in the carriage bolt again but this time with the head facing the bow tie, then place the bow tie in it’s spot. Then I could ground off to the bolt itself, shove it up against the bow tie then give it a few good tacks to hold it there.

Securing the Bow Ties

Next I could thread on a nut and have an easy way to draw in and hold onto the bow tie. I like this method over gluing them in because I don’t know how the wood will react over time to these. I’m curious to see if the wood movement will pop them out, or maybe deform slightly around them, or if it will all work great together. Either way, I wanted to leave myself a way to take them off and do some work if the need arises.

Man alive, it was a ton of work to get this far and I can’t tell you how pleased I am with it. I love having a gate that is super unique and representative of something I love. I also really like that only a small population of people will be able to see the gate and understand what it is. Stay tuned for the next video where I cover the installation process of this gate and the previous gate. I’ll see you then.

The post Building a 14′ Custom Metal/Wood Gate appeared first on Wilker Do's.


from Wilker Do's https://ift.tt/2nOsqPH

How Covid-19 Affects the Housing Market in College Towns

The Covid-19 pandemic has led to major lifestyle changes. That could significantly impact the housing market in college towns, according to ...