Welcome to my latest project, a walk in garden.

A few months ago I built a single raised garden bed to try my hand at gardening but wasn’t able to get very far with the trial because the deer munched everything I attempted to grow.

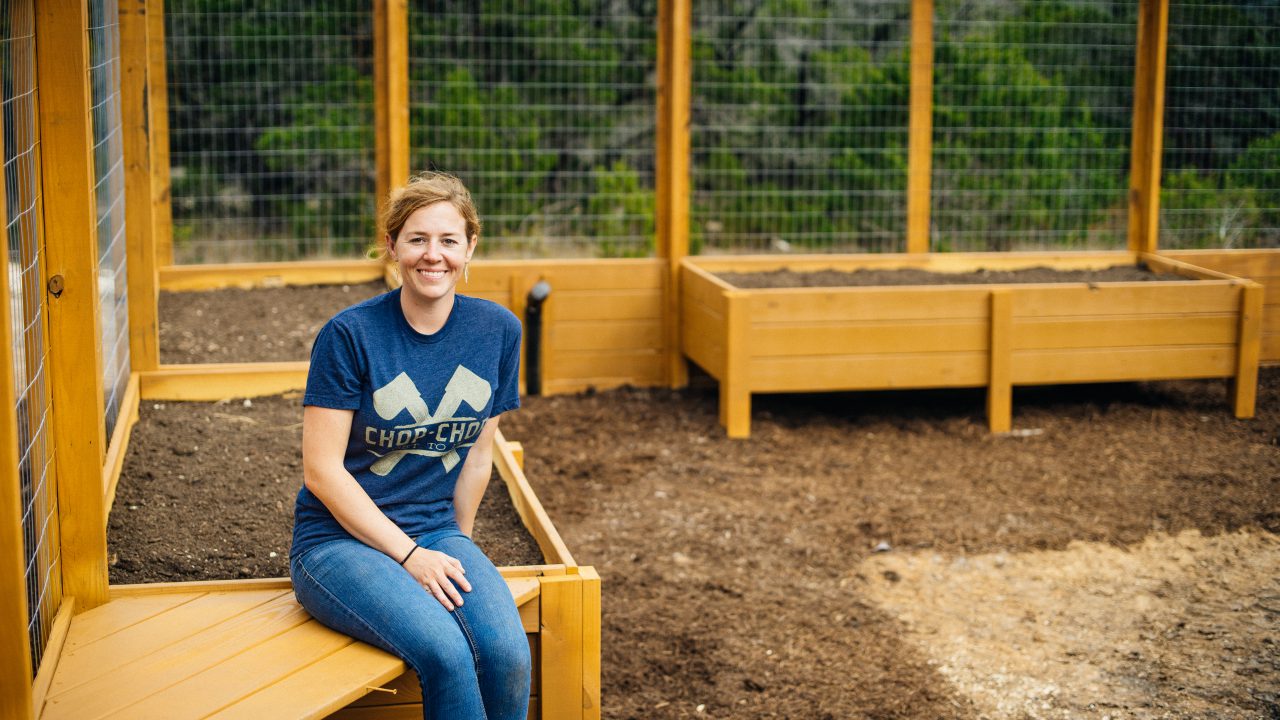
That lead me into looking at a fenced in design. I wanted something where the fence was built into the planter boxes and since I have a pretty big space, I kinda went overboard…..well everybody else is saying that, I think it’s fine.
While I went large with mine, you can very easily modify it to be much smaller, larger, or in a different configuration completely. The idea behind the design is to be able to build one planter box then join it to another that is built the same. Giving you the flexibility to have a U shaped space, an H shaped space, or even a giant rectangle.


If you would like to build your own, everything I used in this project is readily available at Lowes Home Improvement and is linked for you below and within this post. Big thank you to Lowes for supporting my channel and sponsoring this project. Lets go ahead and jump into the building process.
Things I Used in This Project:
- Garden Plans: http://bit.ly/3b3msSu
- 2/6 lumber: https://low.es/370B166
- 2/4 lumber: https://low.es/2OsGKv9
- 5/4 boards: https://low.es/2OswBOY
- Fencing: https://low.es/37TpRkZ
- R panel metal roofing: https://low.es/2GUquPo
- Cedar Mulch: https://low.es/2SgEUyC
- Garden Soil: https://low.es/2GWmP3I
- Lowe’s Material Delivery: https://low.es/2RVGkQa
- Titebond III: https://low.es/2GUBtbv
- Miter saw: http://amzn.to/2tF5Azc
- Miter saw stand: http://bit.ly/2XKAo0J
- Sketchup 3D modeling: http://bit.ly/2uehhtC
- Sawhorses: http://bit.ly/30k2Gxq
- Screws: https://low.es/2RVUgJW
- Bessey clamps: https://amzn.to/2YZ0Dxk
- Bessey Snips: https://amzn.to/3b5eW9K
- Diablo steel demon blade: https://amzn.to/2Fb8yPl
- Superjaws: https://amzn.to/2YwYFV9
- Total Boat Varnish: http://bit.ly/393nEU2
- Armor tool workbench: http://bit.ly/2JL03ix
- Bluetooth Hearing Protection ISOtunes: http://bit.ly/2rVobCD
- Pavers: https://low.es/2uZtZkR
- Palm nailer pneumatic: https://low.es/37Wun24
- 6 mil plastic: https://low.es/399OGJs
- Triton circular saw: https://amzn.to/2u3FzLT
- Weed barrier: https://low.es/2Ov2FSy
Wouldn’t you just know it that the week I wanted to build an outdoor project, it would be rainy all week? The weather drastically effected the way I went about building these planters because instead of building them on location where they would end up, I built them all in my shop, stored them, then moved them out the following week when the sun came back out.

With that, I utilized my shop’s porch to cut down all the material needed to start building the planter boxes. I will be building 12 boxes for my layout and used my 3D modeling software SketchUp to first model the entire garden to generate a cultist.

This allowed me to set up a stop block at my miter saw and cut all the pieces needed for every bed before moving on to the next length and repeating. Regardless of how big or small you go with this project a cultist will drastically speed up the time it takes to build.

The first day I started building, I only had my 2x4s on hand, the rest of the material was set for deliver the following day, so I first built all the planter’s inside framing first. This will make up the bottom of each box and is a simple rectangle that’s like framing up a small wall.

To speed up the process of placing each joist, I used a spacer cut to the right length to space them apart as I was placing them.

After attaching one side, I repeated to attach the other. Of course since I had 12 boxes, I made 12, setting each one aside after I was finished to reuse my large table and avoid working on the ground.
The next day started off by receiving all the other needed material for this project.

Since it’s so much material, I took advantage of Lowes delivery service where all I had to do was place an order for how much I needed. Then, Lowe’s loaded it up all nice and neat, delivered it to my workshop, then also off loaded it where it needed to go. Keep this option in mind if you have a big job that requires a lot of material or even if you have a moderate sized job but don’t have a vehicle to transport the material in.

With my additional material on hand, I continued cutting up needed boards by setting up a few more stop blocks on my miter saw. I cut small boards to make up the insides bracing pieces that will hold together the slat material.

Then longer boards that will make up all the feet. And just a tip for you: if you’re cutting up a large quantity like me, place your cut boards in columns of 10s or 15s so they are easy to count at a glance.

After getting all the next step pieces cut, I placed a frame back up on the worktable and started building onto it. First by adding the first row of slatted material all the way around the perimeter of the frame.

Then adding what will be the inside braces.

With these in, it gives me a place to add the rest of the needed slat material that will make up the top of the planter box.

Now, I am using treated material for this entire build, but before you say it isn’t good for the food, treated material is now treated with copper and potassium instead of chemicals and several studies I have ready have shown that it doesn’t seep into plants growing in the soil. In fact, treated wood is actually FDA approved.
Once the entire planter box was complete, it was time to start attaching the legs and this is faaaar easier to do with the box on it’s side rather than it’s bottom, so I would move the planter box down to my shop floor then start attaching the legs.

Ok so one cool part of the design is that each box connects to the previous one, with that each individual box only gets four legs attached…..because this one gets four legs here…

…then its remaining legs gets added when the neighboring box gets added to it.

The front of the box gets short legs since it will be inside the fence, but the back of the box gets tall legs so that fencing can later be added onto it. I would start off attaching the short front legs by clamping them in place with a strong holding Bessey clamp, then go to the inside and screw it in place, after making sure it was sitting square to the top edge.
It’s probably hard to tell on camera, but this thing isn’t light at this point. Treated material is great for holding up to the elements but it’s heavy right off the shelf until it dries out. So instead of trying to build then move it by carrying them, we moved in a shop cart to set the box on then attached the tall legs.

This meant after the legs were attached, the entire heavy unit could easily be moved to the other side of the wood shop to be stored out of the way.

Then I could repeat the entire process to start building out the next one. And let me tell you, by planter number 10, I was getting really worried about running out of room to store these beasts, but I did think it looked hilarious at the end of the day to look around and see a sea of planters.

By the way, this was a huge project so I brought in some help to help me knock it out. This is Jake.

While I was building the main body of the planters, he was out on the muddy job site setting up all the pavers in their locations.

He was also taking the cut leg pieces and assembling them into their T or L shape, then also going back through and attaching joist hangers just to give each box’s bottom a more sturdy bed. It’s surprising how heavy 12” of soil is.

The next day, thankfully the sun was finally back out and that meant it was time to start moving the planters to their location outside. With the planters being so heavy, I placed my fork attachments on the bucket of my tractor and used it to pick up the planter and move it to it’s pavers.

I thought it was a blast setting all the giant planters. The guys would use the cart to once again transport the box out to the shop’s porch and position it so that I could pick it up with the tractor so that when I moved it to location, it would be facing the correct way and I just had to get it close enough to be on the pavers for it to then be scooted by hand in it’s exact place. Which is not only lined up to the pavers edge but also interconnected to the neighboring planter box.

This was as simple as slightly lifting the end without legs, and placing it into the end of the next one already in place. Then going to the inside to screw it all together.

It’s always the craziest thing to go from looking at a 3D model in SketchUp to looking at the real thing in front of me and I’ll tell you this, it saves a lot of time and mistakes to build it first in digital form before building it in tangible form.


Ok with the planter boxes in place now it was time to finish out the skirting along the bottom. I designed it so that the outside will have slats running down to the ground so that smaller animals won’t be able to waltz right in but then the inside will be left open and exposed.

While I was working on the skirting, Jake was going around to the posts and trimming them all level. It’s far faster to leave the posts tall then trim them exactly once they are in place.

Once we were both done, we worked together to start building out the framing for the fencing. This step goes quickly with two people because all the boards can be cut to the needed length beforehand then quickly thrown up. Make sure it’s flush on top because the next thing to add is the top cap which sits on top.


You can determine the height of the fence needed on the garden based off of what animals you have around that you’re trying to keep out. I have tons of deer where I’m at, so that’s why my fencing is so tall.

After the top trim and cap are in place, now is the fencing. You can go with a wide variety of material here depending on what look you like as well as what animals you’re trying to keep out. I went with a thicker gauged option that has slightly larger squares than hardware cloth.

Once the panels are cut to the proper width it’s back to quickly achieving another step because they just fly going up. This is most certainly a two person job because the fencing needs to be pulled or stretched to lay down tight and not have any waves in it. Jake would start off stapling one side to the frame, then I would pull each section as much as I could so he could staple it to the center member then we’d rotate around and I would push while he stapled the last stretch to the right.
When doing this, try and place your staples close to the horizontal sections of the fencing and not just out in the middle. This will make it stronger should a animal start pushing on it from the other side.

For the planters bottom I debated on doing either plywood or slatting with wood but Jake had the great suggestion of using metal roofing material. It’s light weight, but very strong and when doing a cost comparison, it came out cheaper than wood. I think it also looks awesome but that doesn’t count since it will be covered up.

Since every sheet will need holes drilled in it to allow water to escape, I drilled those while the sheets were piled on top of each other so that I could punch through all of them at once.

Then since that went so well, I thought I would also try to cut all the sheets at the same time when cutting them to length. I used the Diablo steel demon blade and it didn’t even blink at cutting through 12 sheets at the same time. This blade is specifically designed to provide less sparks, and also a burr-free finish so if you’re cutting metal, I recommend seeking it out.


Then before the bottom can go in, I also had to cut around those inside braces and I did this with my Bessey tin snips. I would make a left and a right cut, cutting a good ways around the brace to make it easy, and then fold the flap up and out of the way. These don’t look the best, but remember that soil will cover them up. Then it came be picked up easily enough and plopped down into the bed.


Then there is also the plastic. Even though treated wood is acceptable material for a garden bed, any wood choice will rot when it’s constantly in contact with wet soil, even treated wood or cedar. So to prevent having to rebuild these prematurely, I also lined the boxes with some plastic. I only messed with lining the sides of the bed with it since the metal is protecting the bottom. You can use a slap stapler to attach this plastic, but it’s far easier to use a staple gun of some sort. I didn’t want to see the plastic in the beds once I had soil in them so I used the top of the inside braces as my reference for aligning this.

Ok and I think that’s it for the planter boxes themselves, one of the last things to build is the gate/entrance which will support two doors. I went into my wood shop in order to build the doors and they are built with simple but strong half laps at all the connections. I started by placing each vertical member of the door in my super jaws then using my circular saw to make multiple cuts so that I could then come back with a chisel and knock out all the pieces until it was flat.


When it came time to cut the half laps in the cross braces of the doors, I decided to try and gang cut them. The SuperJaws have a feature where you can flip the jaws around to drastically expand your holding capacity.

I did that to hold every cross brace, clamped two boards on the top and bottom to hold the faces flat to one another, then repeated with making multiple cuts with my circular saw. Hehehe, and I’m very please to say this worked! It saved me a ton of time by doing it all together rather than individually.

Then to put things together, I used some water proof glue, some Bessey clamps to hold things tightly together, then a few screws to secure it permanently. Easy peasy. Now they could get screened in then taken outside to get hung in place on the garden!


Right on the inside of the doors is kinda of a wasted spot, so to utilize it and make it functional, we threw up a few 2x4s horizontally then used the left over 5/4 boards to span across and make a make shift table. I haven’t done a lot of gardening before but with so many beds, I imagine a few tables on the inside will come in handy.

Alrighty, and that is the build portion of this project complete! Now it was to put on the finishing touches.
Then a finish! I chose to go with an ECO varnish from Total Boat and since the project is so large, I sprayed it on. This is a UV stable gloss finish that is water based and dries very fast. It also doesn’t require sanding in between coats so I was able to get five coats on in a single day which is extraordinary. It’s a low odor, low VOC formula that cleans up with soap and water.


While I did come a long ways with the garden, I still have plenty to do before it’s complete.

In the center I want to do a much lower raised bed and dedicate the center to raspberries and blackberries. I also want to look into either a netting or another covering option to keep birds out and provide the plants some protection from the extreme sun. Then of course irrigation. Since I just had a rain water collection system installed, the guys were kind enough to run a spigot all the way into the perimeter of my garden so I have a watering source. This will be great for the beds, but I’m also thinking an outdoor sink will be useful.

Remember if you’d like to build your own that you can take the way of building one and joining it to another, then come up with your own size and configuration to fit your space and needs. I have four options of plans HERE that come with a material list, if you’d like to check it out.
I would love to hear what you think of my new garden compound down in the comment section.
I’ll see you on my next project.


from Wilker Do's https://ift.tt/2H0CVt5


No comments:
Post a Comment