Lets talk chickens!

I built this chicken coop last summer and have been loving my chickens but I don’t like having to come out first thing every morning and every evening to coop and uncoop them. If you don’t know, chickens will go inside their chicken coop every evening on their own around dusk. But I still have to be here or come out here to shut the door and keep them safe.
So this week I finally tackled building my own automatic chicken coop door. It’s on a photocell so when this device here senses light, it will open the door and let the girls range.

Then when it no longer senses light, it will shut. I was worried about cloudy days but so far there hasn’t been any issues with it!

Let me show you how I made it.
Things I Used in This Project:
- ISOtunes Ear Protection: http://bit.ly/2YuZBtr https://bit.ly/2Cf6OXP
- Linear Actuator: https://bit.ly/358lHFB
- Clamps: https://amzn.to/2T0Fvqo
- Battery: https://amzn.to/37bUvsm
- Door Hinges: https://amzn.to/3dIjG71
- Solar Sensor: https://bit.ly/3m0VRKL
- 12V Relay: https://bit.ly/2HcGxvz
If you’re interested, I have a set of plans available that has a full material list. You can find the plans for this door HERE and also the plans for my coop HERE (or at the bottom of this page).
Ok, I started by making the door. For this I’m using scraps from my shop and just gave them a few good coats of paint.

All of the components for this build will be hidden under the chicken coop itself then also under the nesting box so I’m not overly worried about using untreated wood.

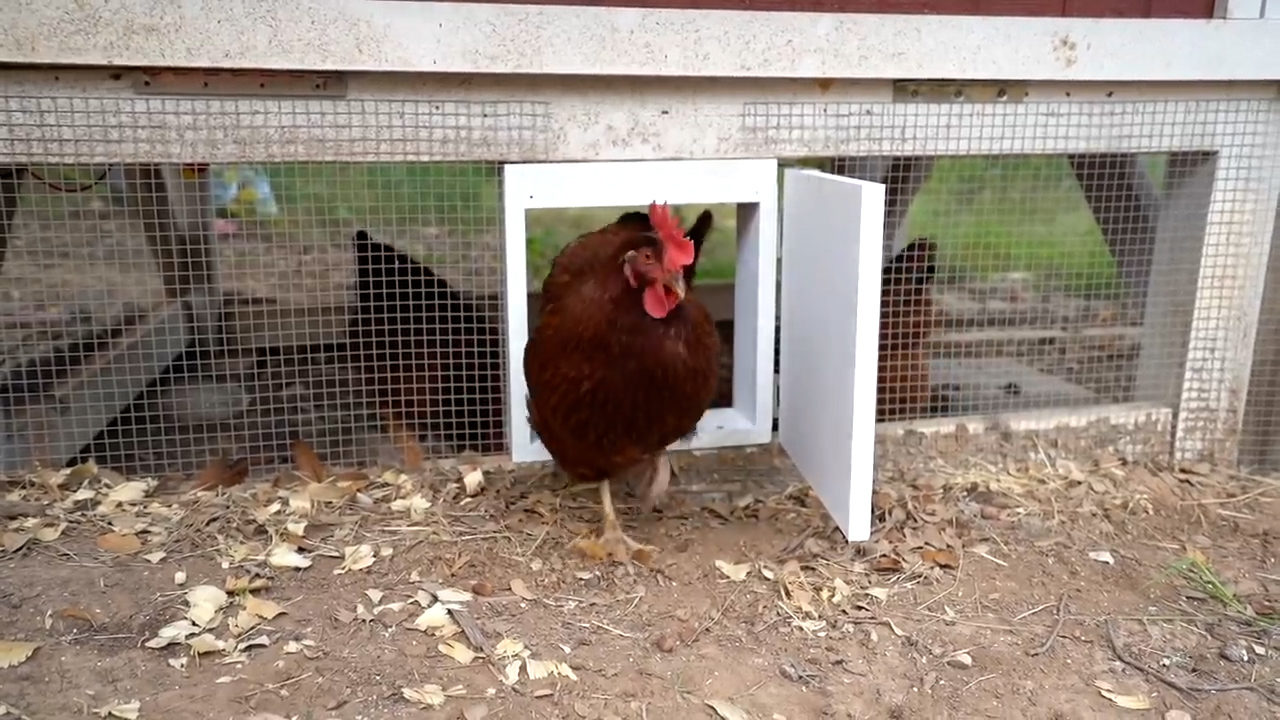
The door itself is very simple, it starts as just a simple box. Next a door is added with two hinges.

The linear actuator is one of the main components that makes this whole thing work. You can go cheap on these guys but if you’re shooting for quality and something that will last then I recommend going with this brand called Progressive Automations. They have a huge variety of not only linear actuators but also other electronic items. Also, it’s worth noting that they have great customer service that are happy to help pick out the item needed for a certain job in mind.

I added in a few more painted scraps to the top, to create a cubby for the actuator to go in.

The actuator will extend out and contract in, which is what controls what opens and closes the door. To attach the two components, I used an L bracket.
I screwed it to the top of the door first then positioned the actuator.

For attaching it correct, the actuator needs to be fully extended. I’m using a transformer temporally to give it power. This is such low voltage that you don’t have to worry about getting shocked. If you hear clicking but no action then reverse the connections and you should see it work.

Perfect, with that done, I clamped the door firmly shut as that’s the position I want to establish when the actuator is fully extended. Once slight pressure is applied to the bracket, the back of the actuator can be screwed down and secured.

Lets test it out and make sure it’s working as it should.
Ok so when installed on the chicken coop I’ll be using a solar panel and battery to power the operations, but first I wanted to wire everything together on my workbench to make sure it worked before going through the actual install.

With that, I added in a relay which is the switch to extend and contract the linear actuator. Then also a photocell which is the component that will sense light and trigger the switch from open to close or visa versa.
With the concept proven and the how to figured out, next it was to install it on the chicken coop. I’m placing all of my important pieces under the chicken coop to keep it out of the rain, which includes the linear actuator, the battery and the relay.

Oh, I also added in a fuse between the battery and the actuator….to add in the door, I cut into my chicken coop wire, added in two studs then slipped the door right into place.

For the photocell to work, it’s placed higher up on the coop and facing West to catch the evening light.

The chickens start going home around night fall and the door stays open until a little bit past that.

If relying on the sun makes you uncomfortable then another option would be to have a timer placed in the system. I didn’t go this direction because I didn’t want to change the settings when the time changes.
I really hope you enjoyed watching this project come together and if you have a coop then I hope you’re inspired to make your own automatic door.
Be sure and watch the video above for an even better tutorial.
I’ll see you on my next project.
- Find Plans to the Automatic Chicken Coop Door Here: https://bit.ly/2IHFqod
- Find Plans to build my Large Coop here: http://bit.ly/2AdYlBB
- Find Plans to build my Compact Coop here: http://bit.ly/2yub1kF
- Find Plans to build my Chicken Run here: http://bit.ly/2nCrdyq
If you haven’t already, don’t forget to sign up at the top of this page for my newsletter so you don’t miss new projects!
The post DIY Automatic Chicken Coop Door appeared first on Wilker Do's.
from Wilker Do's https://ift.tt/2HCQJhd


No comments:
Post a Comment